After learning how to create Virtual Machine instances on Azure and AWS, let’s understand how you can set up your cloud environment with the third popular cloud platform – Google Cloud Provider (GCP).
You can create an instance on GCP in one of the three ways –
- Google Cloud Console,
- gcloud command-line tool
- Compute Engine API
In this blog, we will create a VM instance using Google Cloud Console. Before doing that, let’s understand different types of machines for creating instances along with their memory and CPU capacities that can help you decide your ideal configuration based on your business needs.
What are the Different Machine Types for Creating Virtual Machine Instances?
Following table lists the various available machine types along with their applications. Each of the Machine Type families is designed to take care of a specific category of workload effectively.
| Machine Type | Recommended Workload | Applications |
| General Purpose – E2 | Day-to-day computing with low cost | App serving, web serving, small-medium databases, back-office applications, development environments, virtual desktops, microservices |
| General Purpose – N1, N2, N2D | Balanced price/performance across a wide range of VM shapes | App serving, web serving, medium-large databases, back-office applications, media/streaming, cache |
| Memory-Optimized – M1, M2 | Ultra high-memory workloads | In-memory analytics, large in-memory databases such as SAP HANA |
| Compute-Optimized – C2 | Ultra-high performance for compute-intensive workloads | Electronic design automation, HPC, single-treaded applications, gaming |
Following table gives a comparison of machine types for memory, CPUs
| Machine Type | Memory (per vCPU) (GB) | vCPUs |
| General-purpose (E2) | 0.5-8 | 2-32 |
| General-purpose (N2) | 0.5-8 | 2-80 |
| General-purpose (N2D) | 0.5-8 | 2-224 |
| General-purpose (N1) | 0.95-6.5 | 1-96 |
| Compute-Optimized | 4 | 4-60 |
| Memory-Optimized ultramem | 24 | 40-416 |
| Memory-Optimized megamem | 24 | 96 |
| E2 shared-core | 4 | 0.25-1 |
| N1 shared-core | 3.0-3.4 | 0.2-0.5 |
After getting to know about the machine types, let’s understand the steps to create a VM on GCP.
Steps to Create VM Instance on GCP
For creating an instance on GCP, you should have the login credentials of Google Cloud Platform as an administrator.
Step 1
Log in to Google Cloud Console.
Step 2
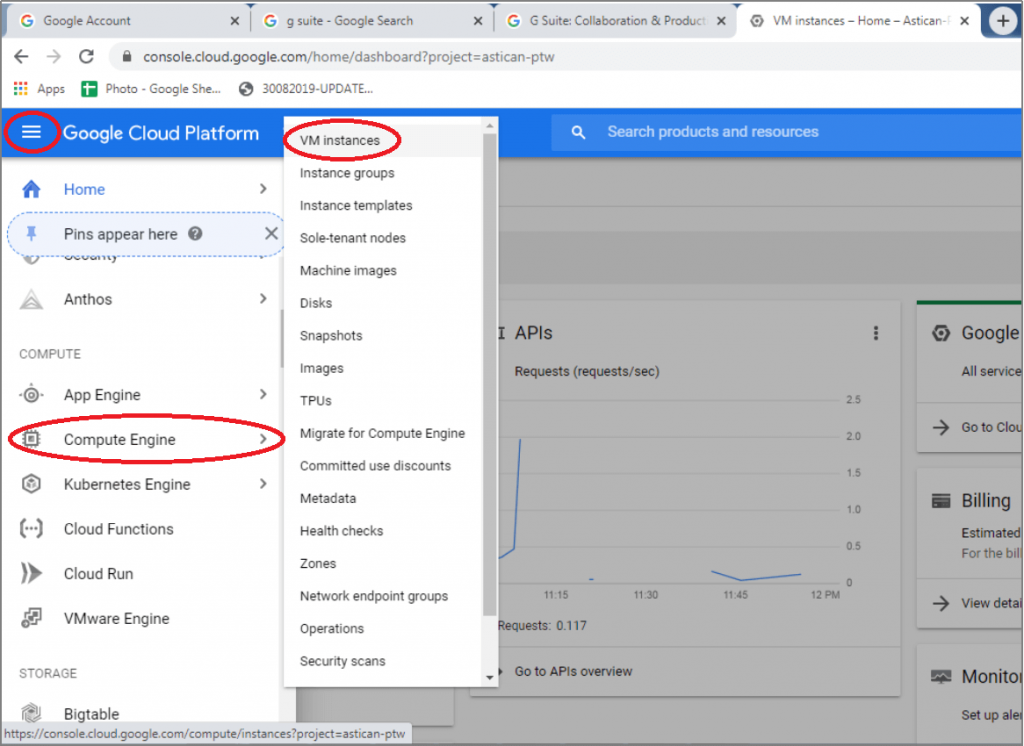
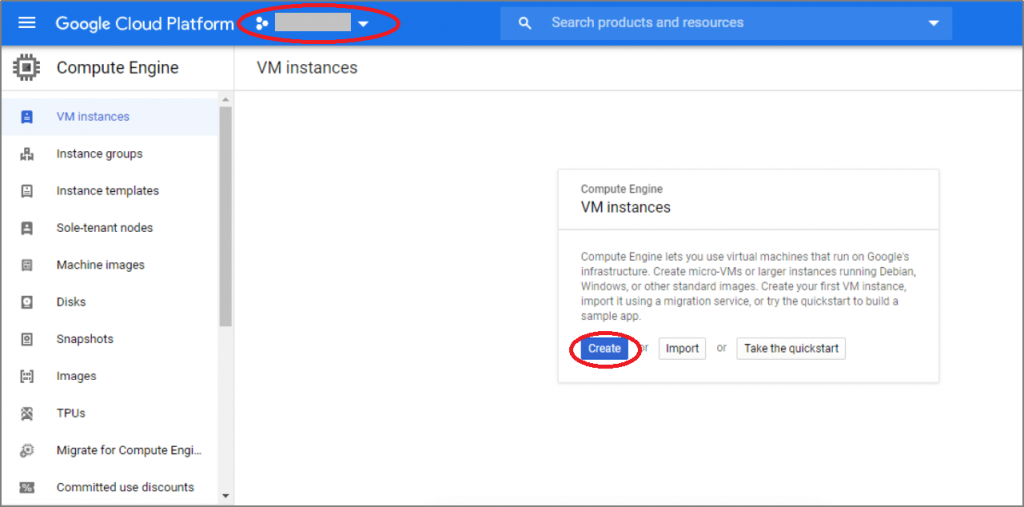
Click on ‘Navigation Menu’ and select ‘Compute Engine’ -> ‘VM instances’.
Step 3
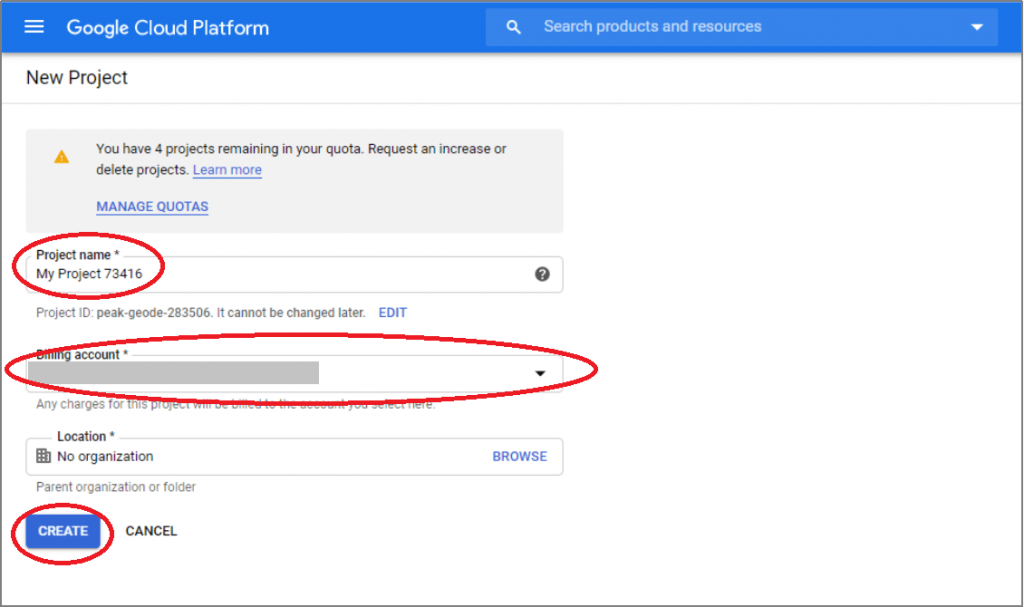
If you are creating the instance for the first time, you will be prompted to create a project. Each instance belongs to a Google Cloud Project, which can have one or more instances. Enter your project name (e.g., ‘My Project 73416’), select Billing Account, and click on the ‘Create’ button.
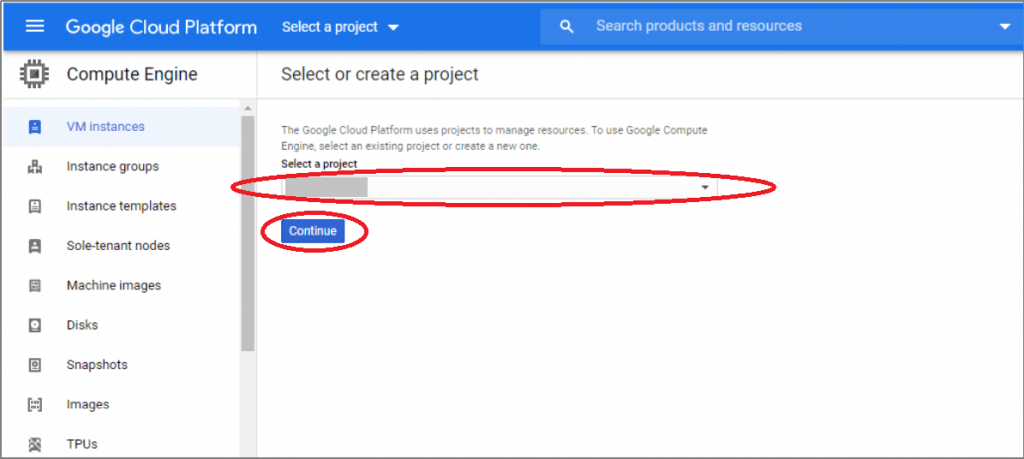
Or, if you already have a project, select it and continue.
Step 4
Your selected project name will appear in the top bar of the screen. Click on the ‘Create’ button of the ‘Compute Engine – VM Instances’ pop-up window, and the ‘Create an instance’ screen will appear.
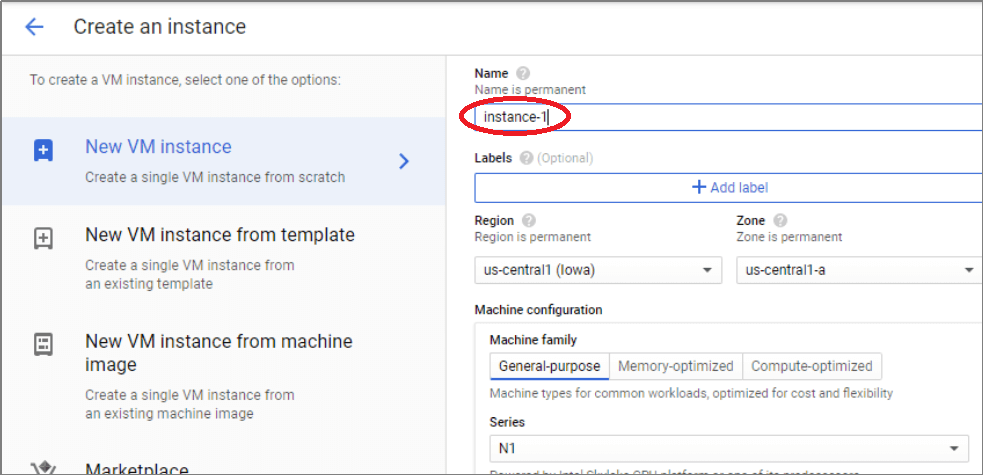
Step 5
Type an instance name as an identifiable name for your instance (e.g., Instance 1).
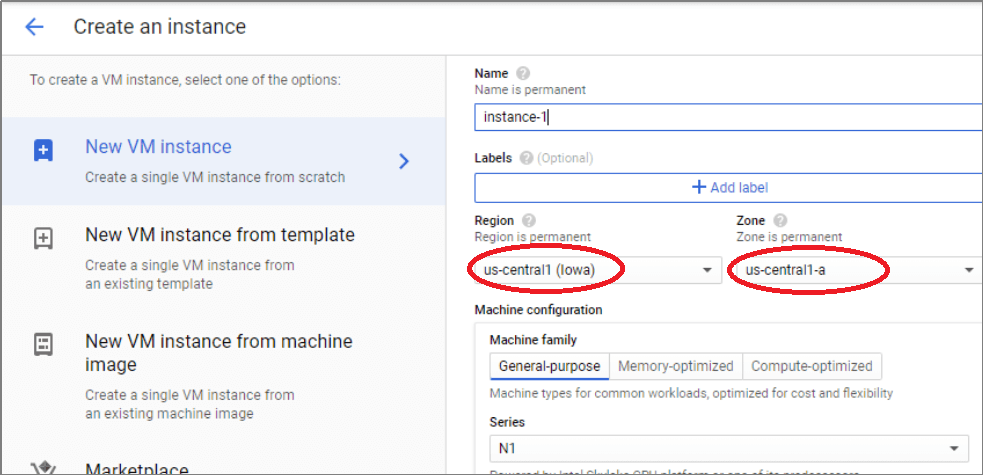
Step 6
Next, select the ‘Region’ and ‘Zone’. Please note that these are permanent settings and hence, need careful consideration while selecting them.
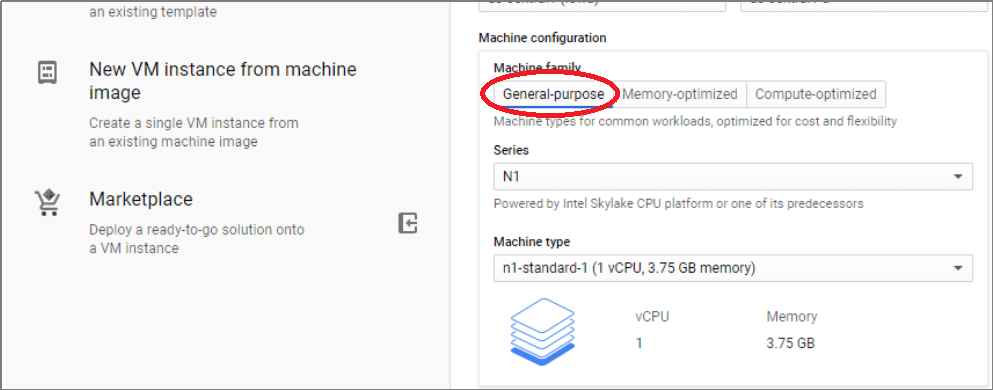
Step 7
Select the required machine type based on your requirement and the table mentioned above. A General Purpose VM can work for Windows Server instance, which we are planning to create now. On the other hand, higher workloads such as databases demand memory-optimized VMs.
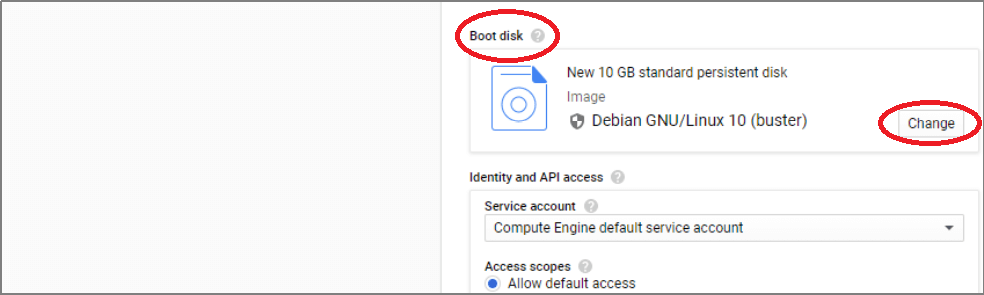
Step 8
Select the ‘Boot Disk’ by selecting the required operating system. As we are creating ‘Windows Server’, click the ‘Change’ button.
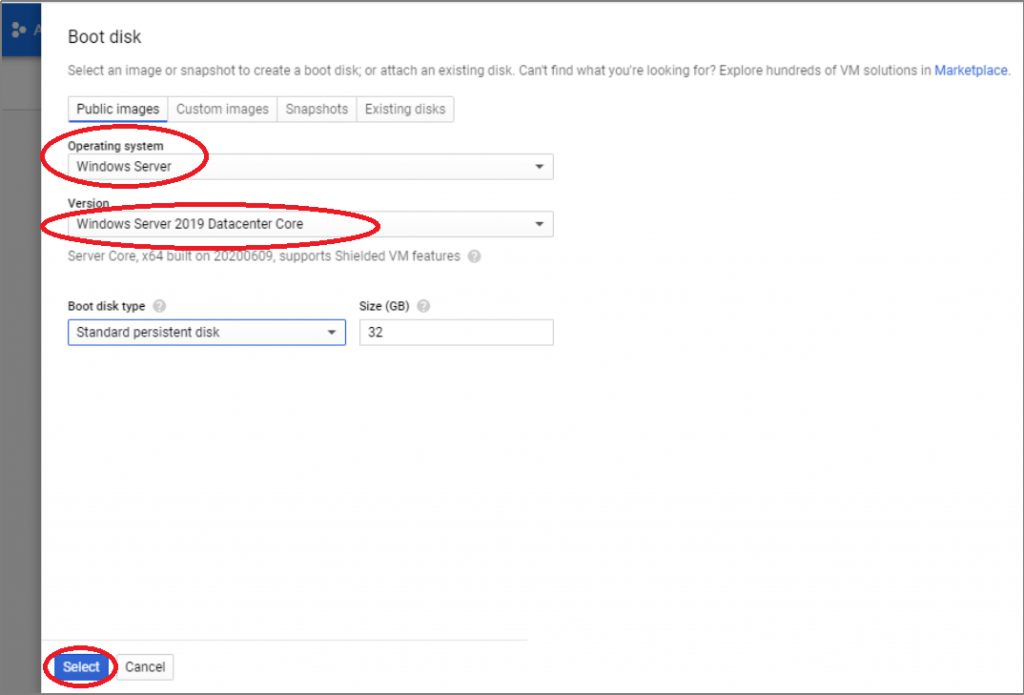
From the ‘Boot Disk’ pop-up window, select the ‘Operating System’ as ‘Windows Server’ and ‘Version’ as ‘Windows Server 2019 Datacenter Core’ and click on the ‘Select’ button.
Step 9
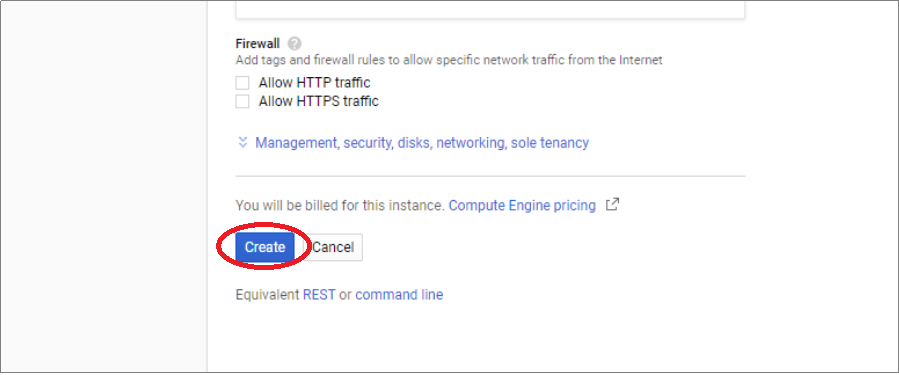
Select if you need API access and Firewall exceptions. These are optional choices. You can give access to your VM to a specific group, individual, or everyone in the organization. Application development primarily needs API access. The firewall settings will dictate whether the VM will be accessible via internet protocols HTTP and HTTPS.

Step 10
Click on the ‘Create’ button. The VM creation and deployment process will take a couple of minutes.
The created VM is listed on the Google Cloud Platform console page.
The above steps guide you through creating Google Cloud instance for Windows. Similarly, you can create GCP instances for other operating systems. Should you need assistance, WaferWire Cloud Technologies can be your next stop for the right guidance. We have the right expertise and experience to suggest the best fitting cloud solution and configuration for your cloud adoption. Get in touch today, and we will be happy to help.