What is EC2 in AWS?
Amazon EC2 (Elastic Compute), is the most widely used AWS service. It helps you create virtual machines with your own choice of configurations that let you launch and manage server instances at any time based on your business needs. In an AWS EC2 instance, you can quickly make web servers, application servers, database servers, mail servers, game servers, media servers, file servers, and more.
There are different types of AWS instances of varying configurations and benefits.
| Instance Type | Features and Benefits | Instance and Applications |
| General Purpose | Offers balance among memory, compute, and networking resources. Used for a variety of workloads. | A1 – Web servers, containerized microservices, caching fleets, distributed data stores, Applications that need Arm instruction set M5, M5a, M5d – Application and web servers, small and medium databases, gaming servers, caching fleets T2, T3 – Web applications and websites, code repositories, development, build, test and staging environments, microservices |
| Compute Optimized | Ideal for compute-dependent applications that need high-performance processors | C4, C5, C5n – Batch processing workloads, High-performance computing, High-performance web servers, Dedicated gaming servers, and ad service agencies, scientific modeling |
| Memory Optimized | Deliver fast performance for processing large data sets in memory | R4, R5, R5a, R5d – High-performance relational and NoSQL databases, Applications that process real-time big data sets such as Hadoop/Spark, etc. |
| Accelerated Computing | Latest gen general-purpose instances, provide an accelerated performance when the CPU clock rate increases | P2, P3, G3, F1 – Accelerated computing. P2, P3 – General purpose instances G3 – Graphic intensive applications |
| Storage Optimized | Designed for workloads that contain very large data sets which should be written in memory and need high, sequential read and write access | D2 – Up to 48 TB of HDD-based local storage with lowest price-per-disk throughput performance on Amazon EC2 H1 – Balance between compute and memory with up to 16 TB of HDD-based local storage I3 – Non-volatile Memory Express (NVMe) SSD-backed instance storage optimized for very high random I/O performance, low latency, high IOPS, high-sequential read throughput at a low cost |
You can create AWS EC2 instances through the AWS console.
Steps to Create EC2 Windows Instance in the AWS Console (Web Portal)
Step 1
Login to AWS Console.
Step 2
After login successfully, you are on the dashboard page. Select ‘Services’ from the top navigation bar and click ‘EC2’ under the category ‘Compute’.

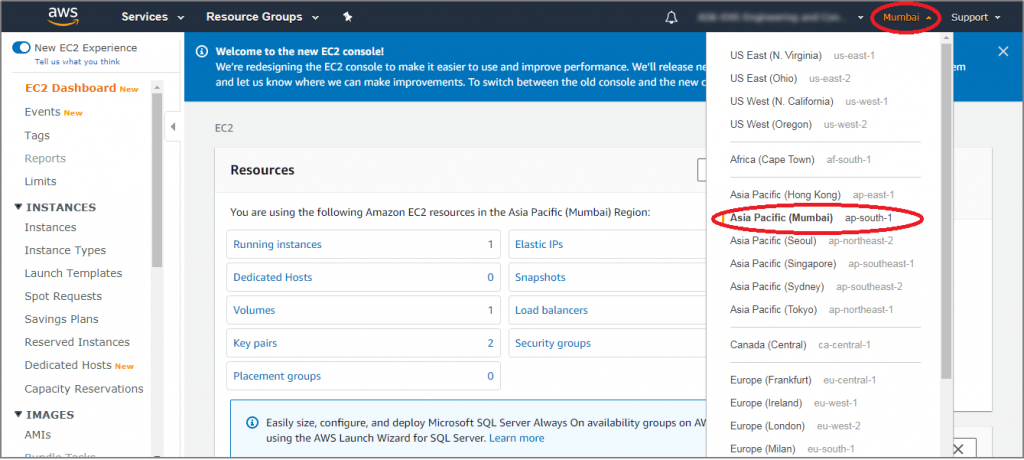
Step 3
On the EC2 instance dashboard page, select the data center closest to your geographical location
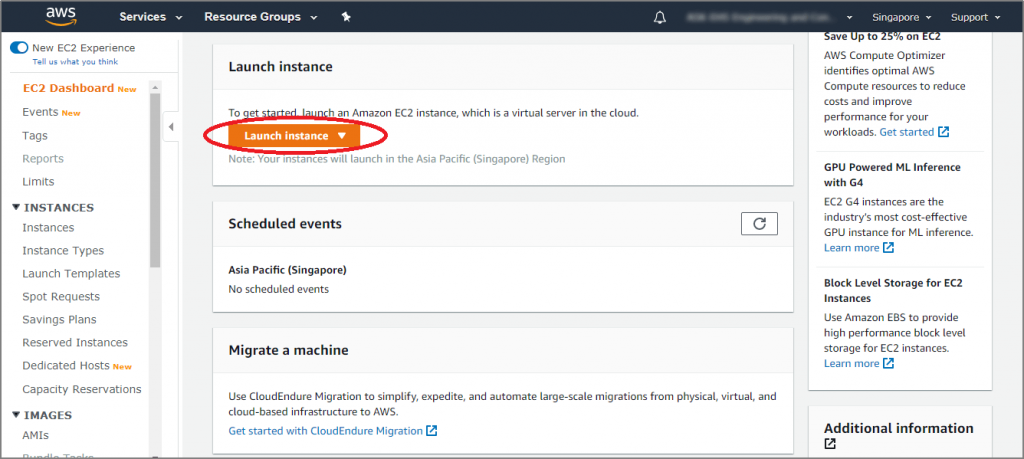
Step 4
Scroll down, and in the ‘Launch Instance’ area, check that the selected region appears below the “Launch Instance’ button. Click on the ‘Launch Instance’ button.
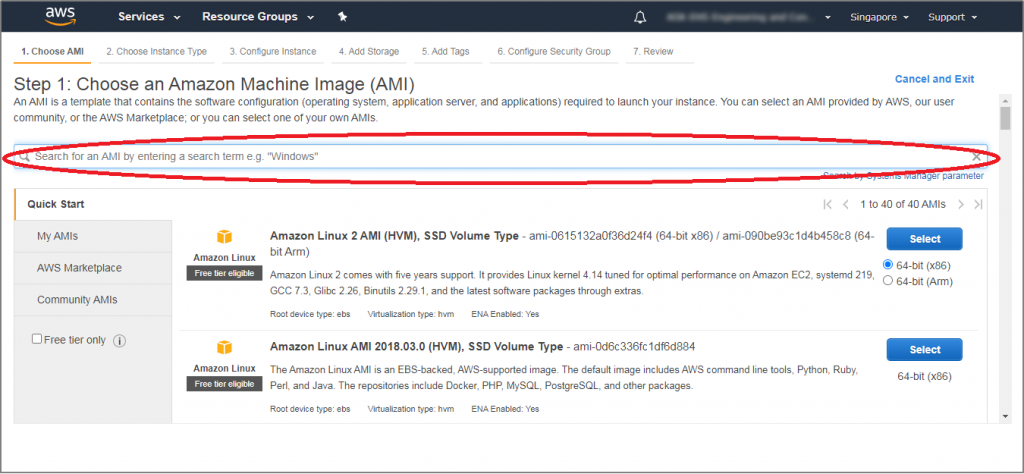
Step 5
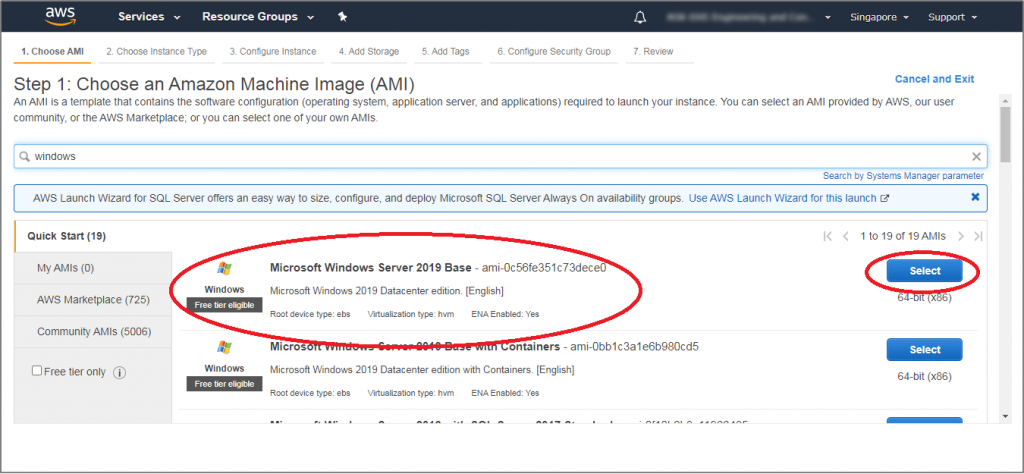
The Amazon Machine Image (AMI) page is displayed. You need to select your operating system for your EC2 instance. E.g., if you want to create Windows Server instance, on the page search, type ‘windows’ as the search option and press ‘enter’.
Step 6
From the list of available images, click on the ‘Select’ button beside the needed image. In this example, we have selected the ‘Microsoft Windows Server 2019 Base’ image.
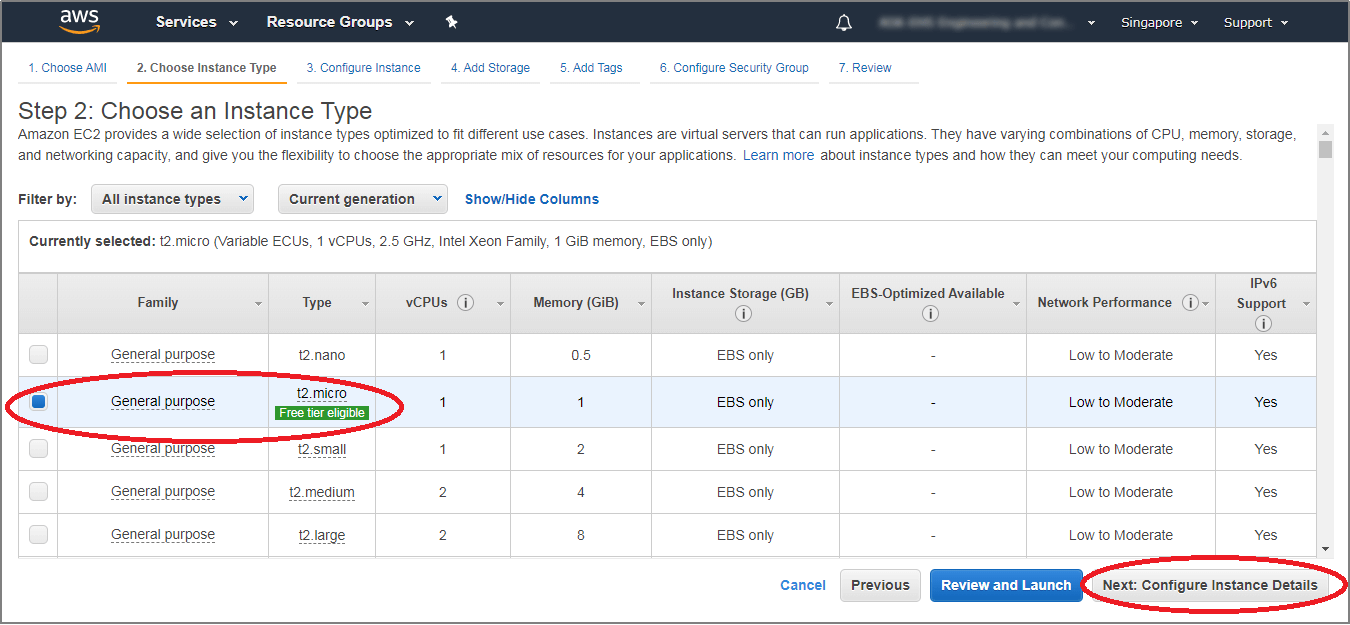
Step 7
On the next page, select the type of the instance based on your requirement like RAM, network performance, etc. AWS selects the default micro instance and click the ‘Next: Configure Instance Details’ button.
Step 8
Enter the number of instances in the ‘Configure Instance Details’ page. The default value is 1, and you can create multiple instances based on your need. Click on the ‘Next: Add Storage’ button.

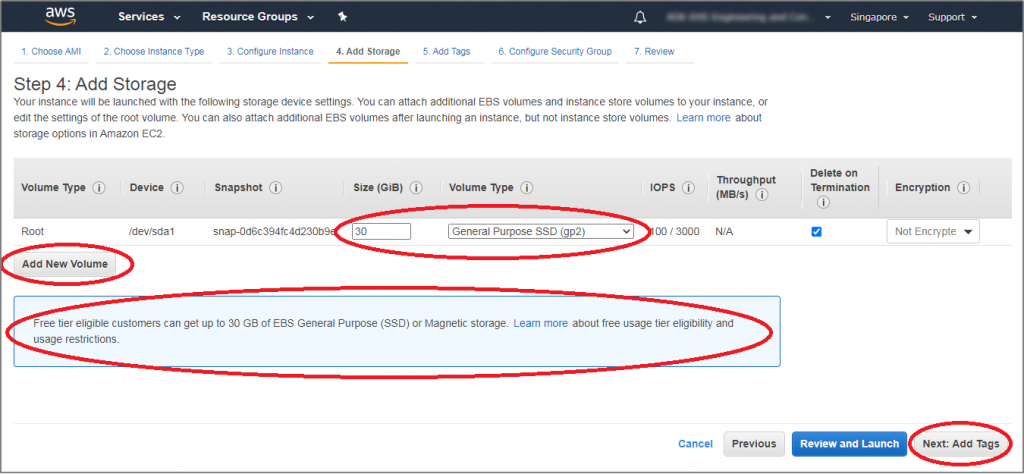
Step 9
On the ‘Add Storage’ page, you can add a storage device for storing your files. With the Free Tier, by default, you get 30GB of storage per instance. You can buy additional storage by clicking on the ‘Add New Volume’ button. Next, click on the ‘Next: Add Tags’ button.
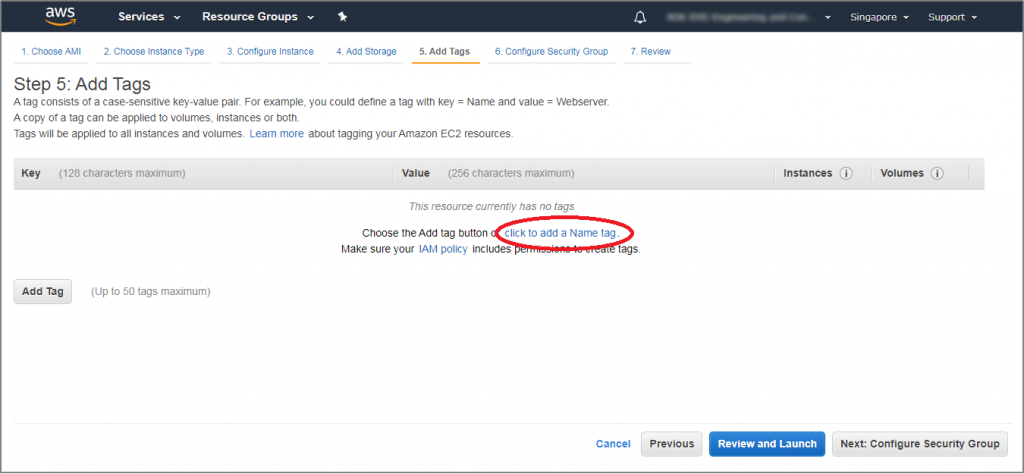
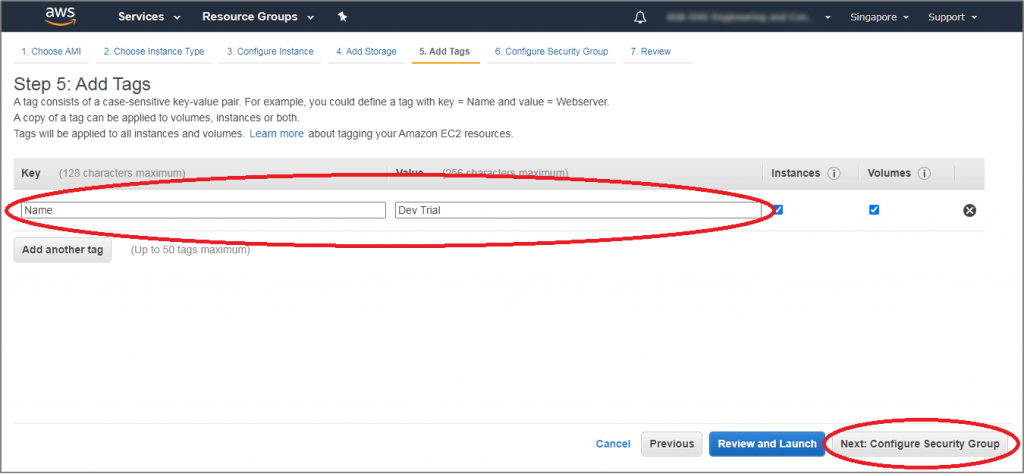
Step 10
In the ‘Add Tags’ page, click the ‘Click to add the Name tag’.
Step 11
In the ‘Key’ field’ type ‘Name’ and enter the values as ‘Dev Trial’. Click the ‘Next: Configure Security Group’ button.
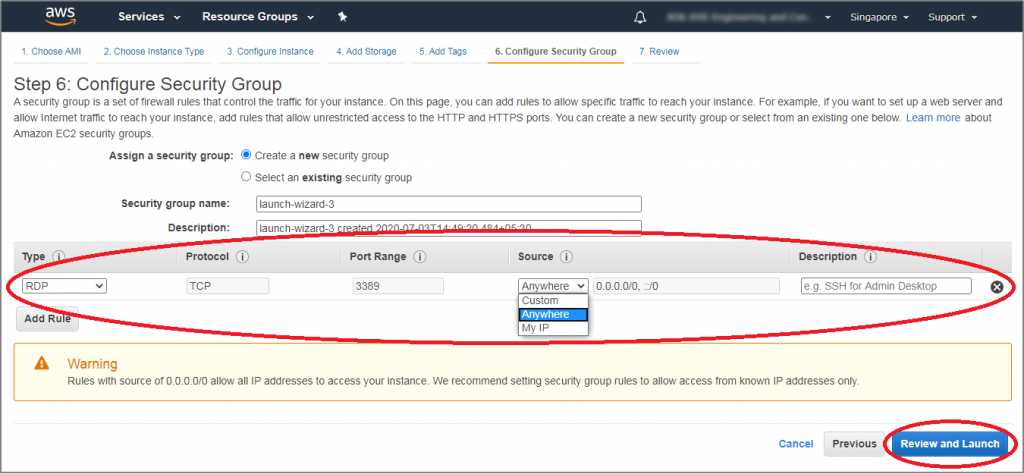
Step 12
On this page, you can choose the configuration to access this EC2 compute instance. By default, you choose the windows image and its automatically defined RDP connection. By default, ‘Custom’ is selected in the ‘Source’ dropdown. You can change it to ‘Anywhere’ to allow any IP address to access your instance. Alternatively, you can select ‘My IP’, which will restrict its access to your IP or keep ‘Custom’ which will allow you to specify the IP address range that can access your EC2 instance. Now, click the ‘Review and Launch’ button.
Step 13
On this page, review all of your selected configurations and click the ‘Launch’ button.

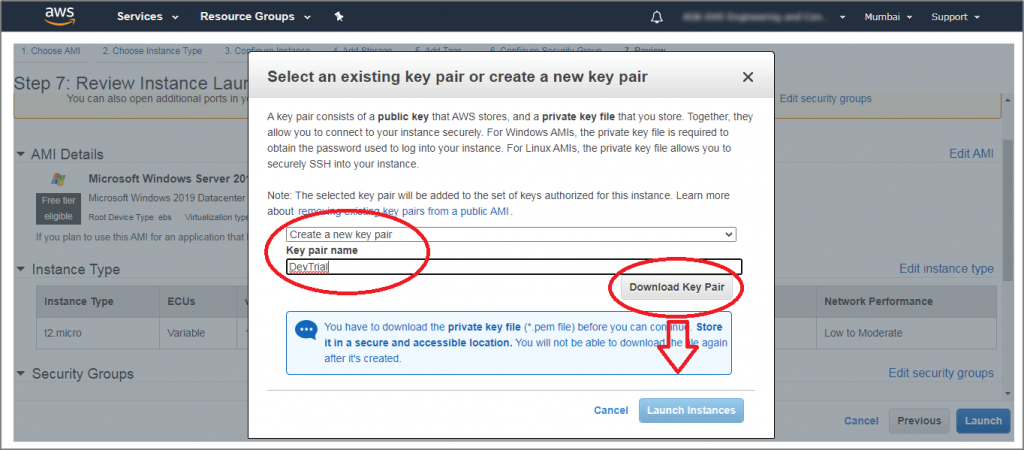
Step 14
A ‘Key Pair’ window is prompted. Select the ‘Create a new key pair’ option from the dropdown, and in the next text field, type a unique key pair name. Click the ‘Download Key Pair’ button. It will download the key pair file with ‘.pem’ extension on your computer. It’s crucial for generating unique passwords for the EC2 instance.
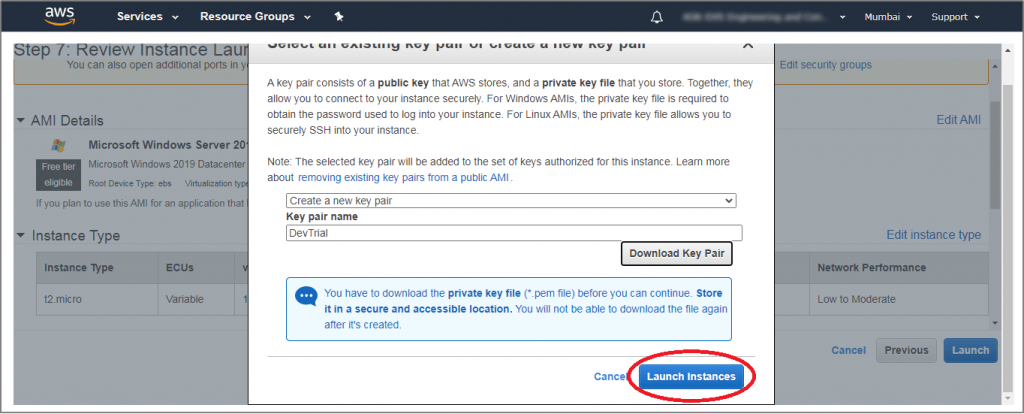
Step 15
Click the ‘Launch Instances’ button, and it’s directed to the launch status page.
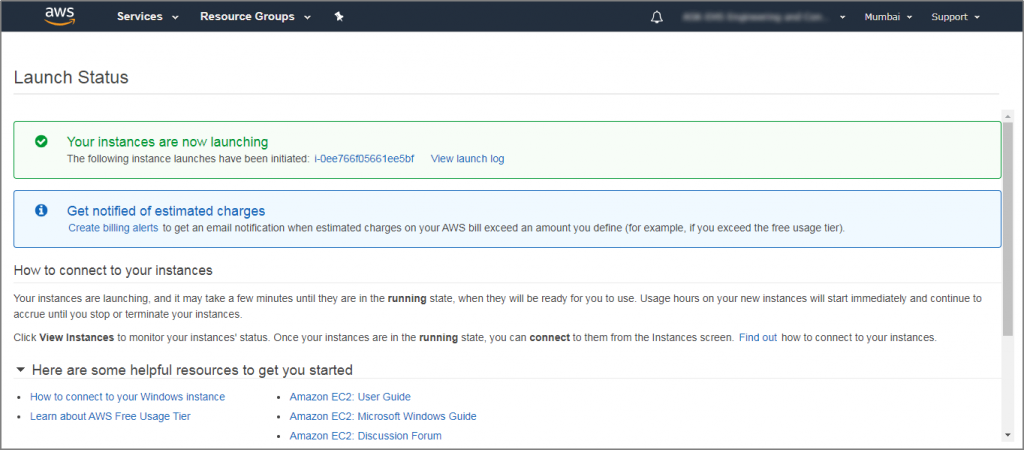
Step 16
The ‘Launch Status’ page is displayed.
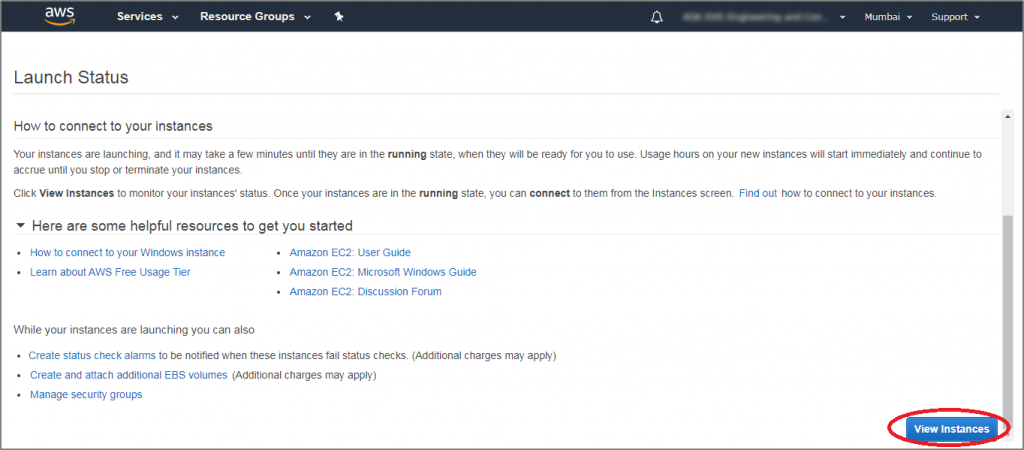
Step 17
Scroll down the page and click on the ‘View Instances’ button.
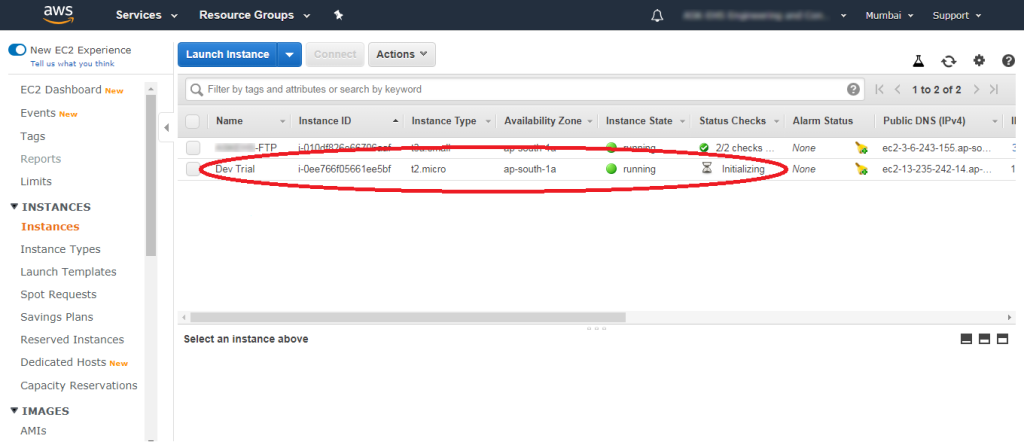
Step 18
All the available instances are displayed. The following image shows that the ‘Dev Trial’ instance is initializing.
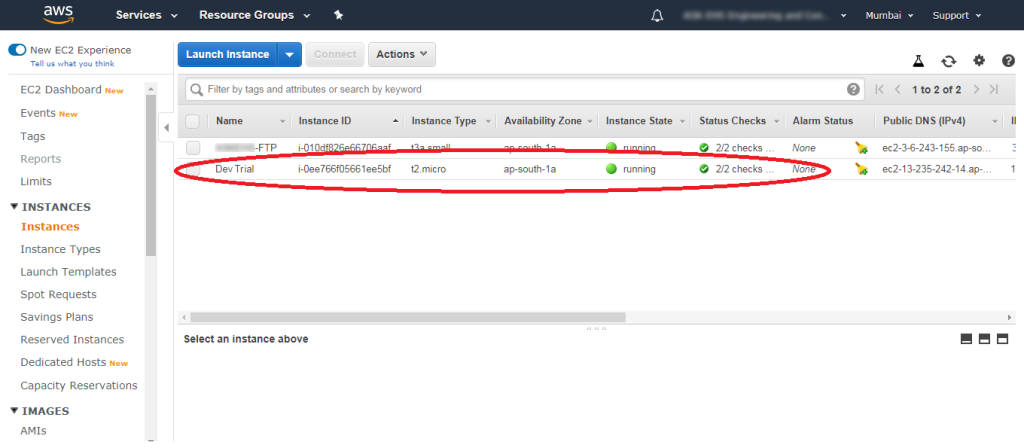
Step 19
The new instance is shown running in the list of instances.
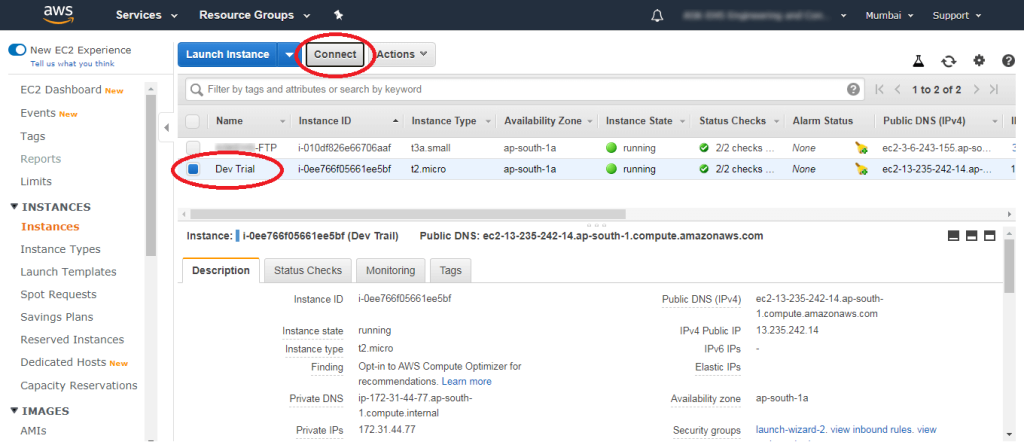
Step 20
Select the newly created instance (‘Dev Trial’ in this case) and click on the ‘Connect’ button.
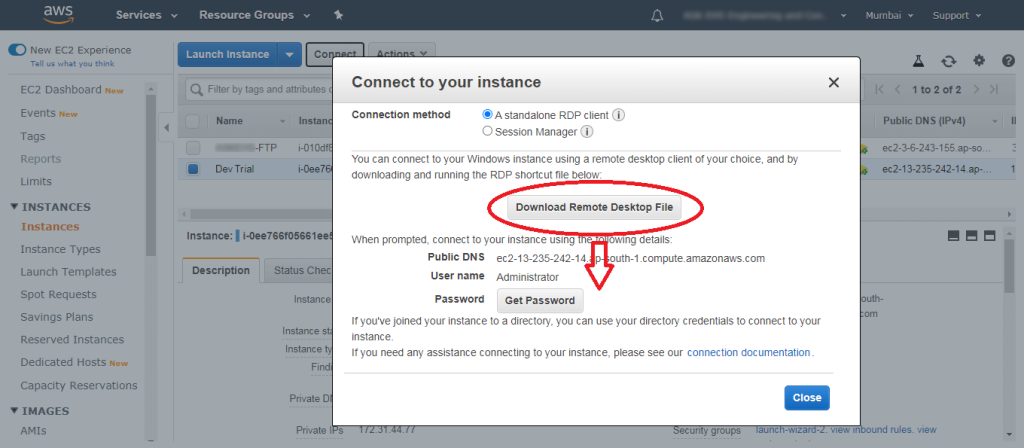
Step 21
In the ‘Connect to your instance’ window, click the ‘Download the Remote Desktop File’ button to download the RDP file. Save it on your computer.
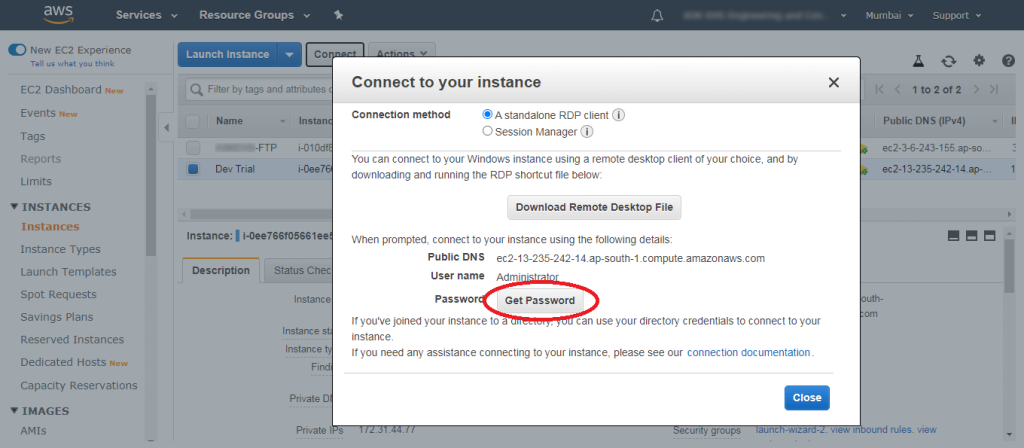
Step 22
Click the ‘Get Password’ button.
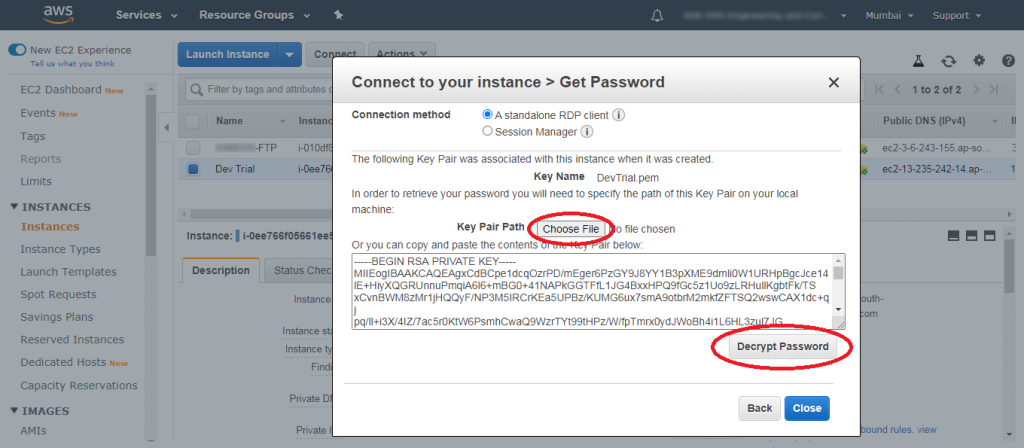
Step 23
Click on the ‘Choose File’ button and select the already downloaded key pair file. Click on the ‘Decrypt Password’ button.
Step 24
The decrypted password will appear. Copy the Password and paste in any word processor file. Click the ‘Close’ button.

Step 25
Now, go to your downloaded RDP file. The RDP software prompts to connect with EC2 instance. Click the ‘Connect’ button. In the popped up ‘Windows Login’ window, paste the previously copied password from the AWS console and click the ‘OK’ button. It will start to establish connections with the AWS EC2 instance.
Following the above steps, you can create Windows Server EC2 instance. Similarly, you can create EC2 instances for other operating systems. If you need assistance, WaferWire Cloud Technologies can be your next stop for the right guidance. With our cloud technology expertise and experience, we can suggest you the best fitting cloud solution and configuration for your cloud adoption. Get in touch today, and we will be happy to help.