
Are you grappling with the challenge of looping through rows in Excel using Microsoft Power Automate for Desktop?
Fear not! It’s a common hurdle, and we’re here to guide you through the solution.
Given the ubiquity of Microsoft Excel in our daily work and academic routines, streamlining repetitive tasks with Microsoft Power Automate for Desktop is a game-changer.
However, amid the multitude of actions available, figuring out how to seamlessly loop through rows in Excel might not be immediately evident.
This blog is a step-by-step guide to demystifying the process of looping through each row in Excel.
But, why is looping through each row in Excel required?
Looping through each row in Excel is necessary for various scenarios to perform actions or operations on individual data points or records. Here are a few reasons why looping through each row is essential:
- Data processing:
When you have a dataset with multiple rows, looping allows you to process each row individually. This looping helps perform calculations, transformations, or other operations on each data point. - Automation of repetitive tasks:
If you need to perform repetitive tasks on each row, looping through the rows automates the process, saving time and reducing manual effort. - Data validation:
Looping enables the validation of data in each row against specific criteria. It allows you to identify and handle errors or discrepancies in individual records. - Conditional logic:
You may have specific conditions or rules that apply differently to each row. Looping through the rows allows you to implement conditional logic based on the values or characteristics of each row. - Data extraction:
When extracting specific information from each row, such as retrieving values from a particular column, looping is necessary to ensure that you collect data from each record. - Database operations:
In scenarios where you interact with a database using Excel data, looping through each row allows you to execute database operations for each record individually. - Dynamic workflows:
Looping with dynamic variables or indices allows you to create flexible and dynamic workflows that adapt to changes in the dataset. - Consistent formatting:
If you want to apply consistent formatting to each row, looping ensures that formatting rules are applied uniformly across the entire dataset.
We will take the following sample Excel file which has 10 rows of data.
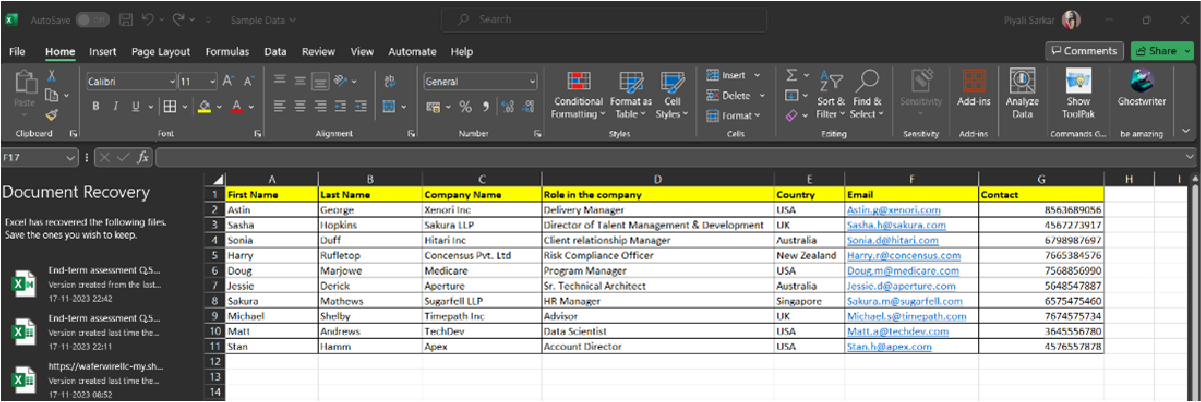
Fig. Sample Dataset
Method 1:
Step 1: Open your Power Automate Desktop App

Fig. Power Automate Desktop App
Step 2: Create a new flow by clicking on “+ New flow.” We are naming it “How to loop through each row in an Excel file” and click on “Create.”
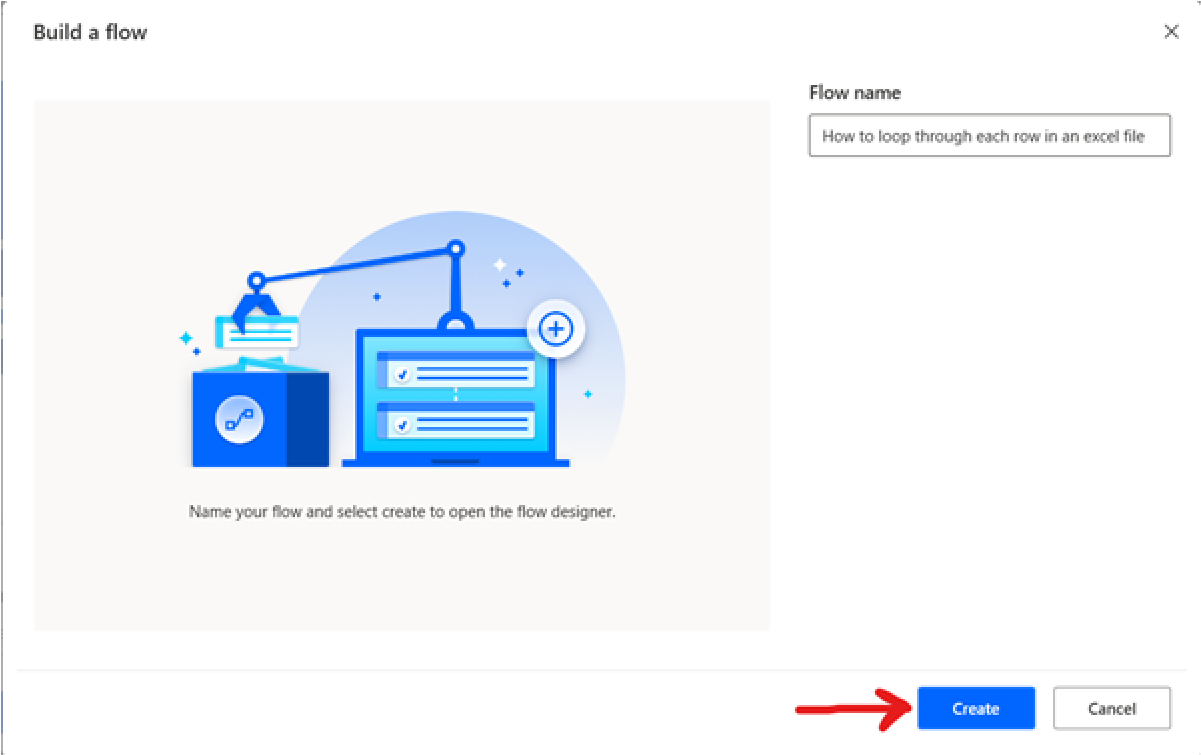
Fig. Create a new flow
On creating this new flow, you get the following screen.
Fig. Your new flow is created
Clicking the newly created flow, you get the screen below.

Fig. Post clicking on the new flow created
Step 3: We will keep our Excel file (The one we generated as a sample) open. In your flow designer, click on Excel > Advanced > Attach to the running Excel document that’s already open. Click on ‘Save’
You get the following screen.
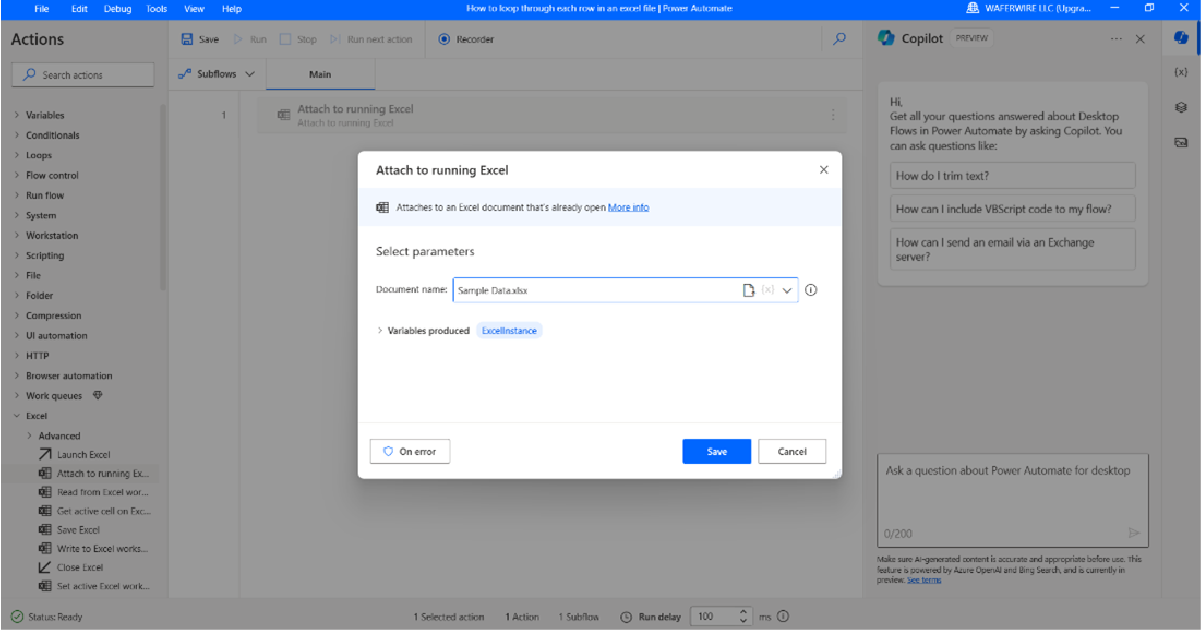
Fig. Attaching the open Excel file
Step 4: Next, we’ll leverage the Loop action in Microsoft Power Automate for Desktop, a feature designed to iterate through actions multiple times.
With the loop action, you can specify the desired number of repetitions.
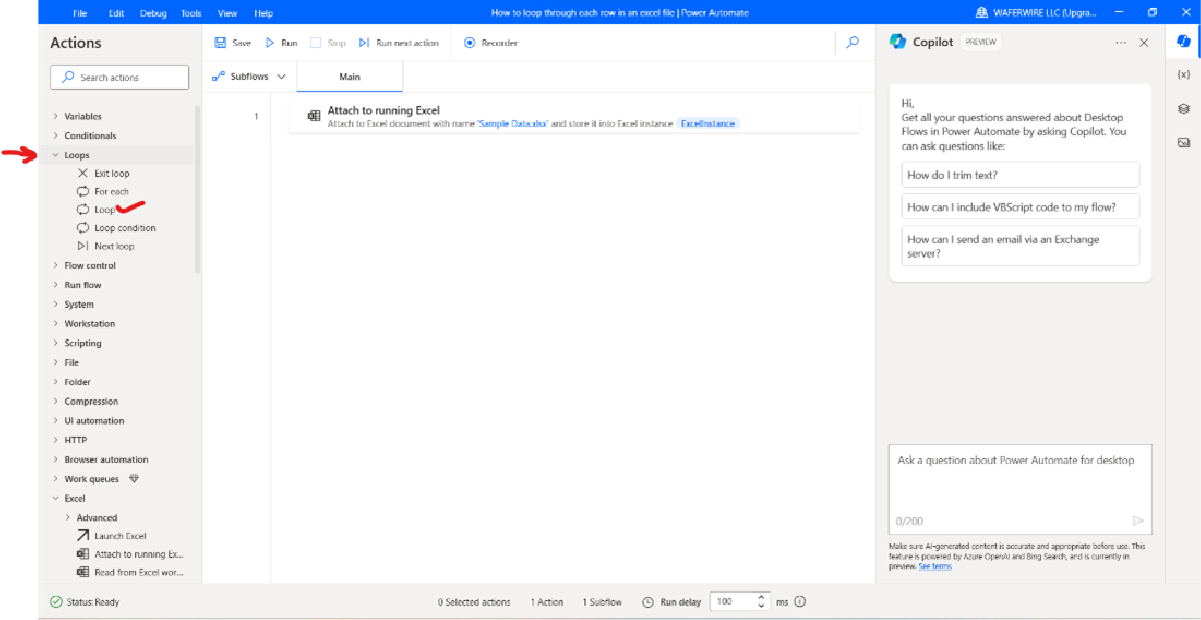
Fig. Selecting ‘Loop’ action in Microsoft Power Automate
On selecting the ‘Loop’ action, you get the following screen-

Fig. The Loop action in Power Automate Desktop App
Given our dataset of 10 rows, we’ll set the loop to repeat 10 times. In the Loop dialogue box, configure the “Start from” parameter as 2, corresponding to the second row in the Excel file, which contains the initial set of data. Configure the “End to” parameter as 11, corresponding to the last row (data entered) in the Excel file. The loop index will increase by 1 in each iteration, ensuring we cycle through each row systematically. Therefore, the increment value is 1. After entering the values, click on “Save.” The screen you get-
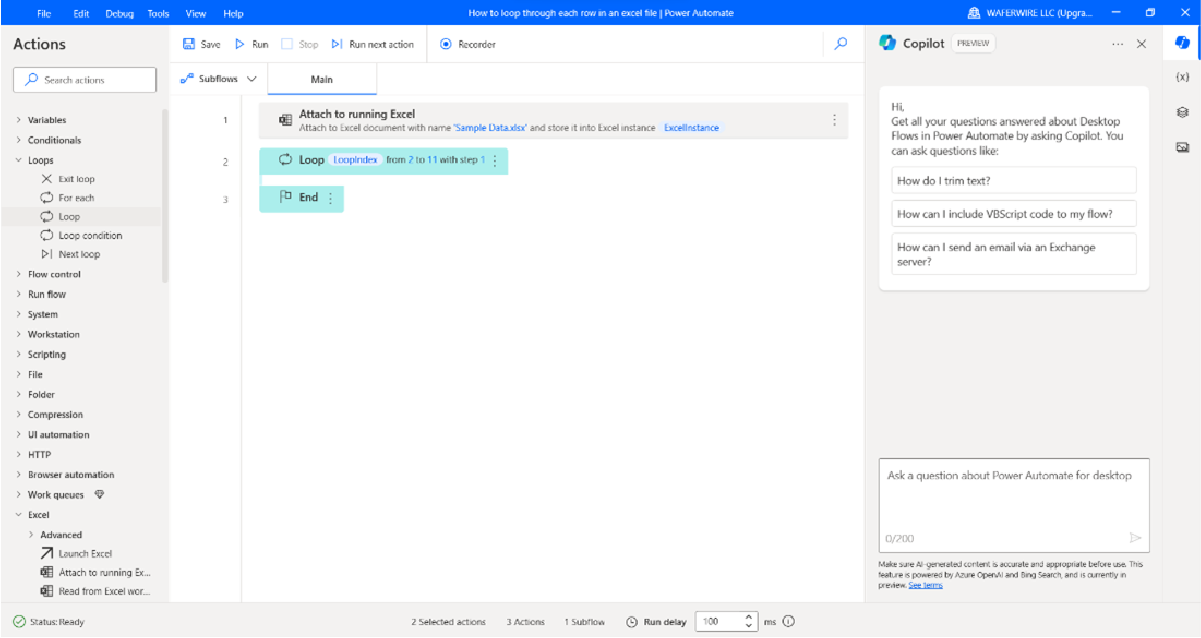
Fig. The loop that is set now
Step 5: Now, following that, to enable the flow to extract information from the Excel file, we will opt for the “Read from Excel worksheet” action. Specifically, we will choose the option under “Retrieve” to obtain the value of an individual cell.
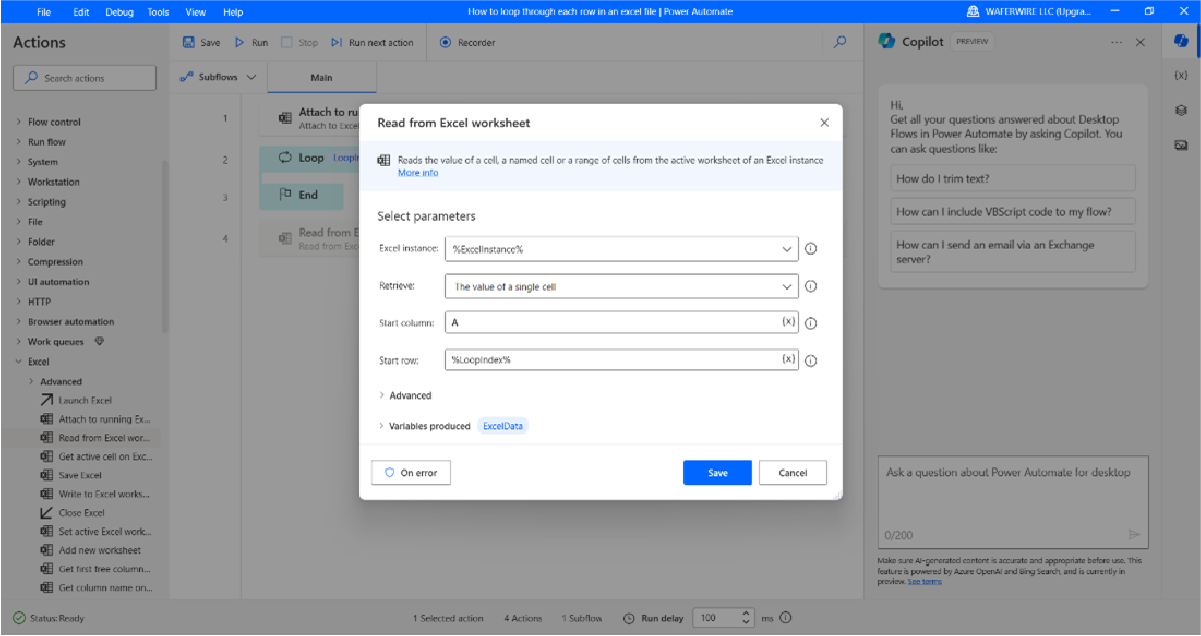
Fig. Read from Excel worksheet
To fetch data from the initial row and column, configure the Start column as “1” or “A,” corresponding to the “First Name” column in the Excel file. Regarding the “Start row,” it’s crucial to highlight that the starting row is not fixed at “2” but is dynamically set as %LoopIndex%. This distinction is vital as, with each loop iteration, the row value evolves from 2 to 11. Click on “Save.” The screen you get:
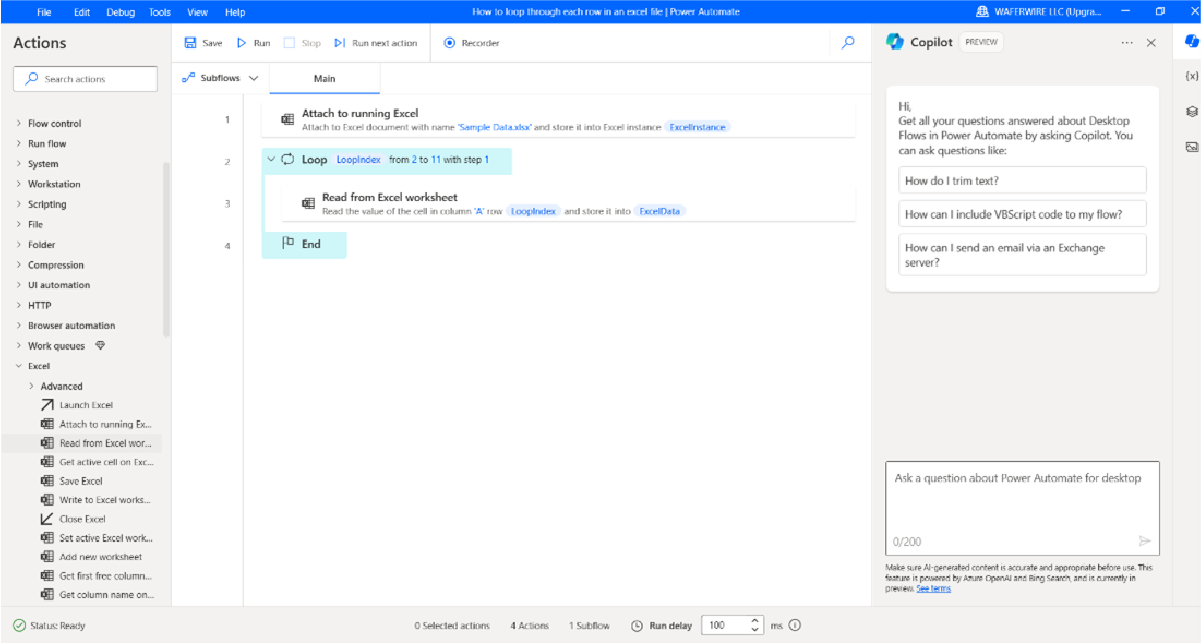
You can repeat this for all other columns as per the need.
Are you ready to try it out?
Explore the seamless process of looping through Excel rows in Microsoft Power Automate for Desktop. Mastering this step is pivotal for unleashing the full potential of Excel actions within the Power Automate environment. Now equipped with the knowledge, it’s your turn to dive in and give it a try! Put your newfound skills to the test and elevate your Excel automation game. Happy automating!