


Thank you! Your submission has been received!
Oops! Something went wrong while submitting the form.


Dynamics 365 Finance and Operations (D365 F&O) is Microsoft’s cloud-based Enterprise Resource Planning (ERP) solution designed to unify global financials and operational processes under one intelligent platform.
It helps businesses automate routine tasks, gain deep financial insights, and ensure compliance with local and international regulations.
Whether you're preparing for your first deployment or fine-tuning an existing setup, this guide provides the foundational steps to ensure a smooth and successful implementation.
Before diving into configuration and deployment, it’s essential to lay the groundwork by meeting all the system prerequisites.

Before diving into the setup process for D365 F&O, it’s essential to ensure that all foundational requirements are in place. Addressing these prerequisites helps avoid delays, misconfigurations, and scalability issues later in the implementation.
To begin, organizations must procure the appropriate licenses through a Microsoft partner or directly via Microsoft. Licensing for D365 F&O typically includes:
Tip: Use Microsoft’s licensing guide to ensure the selected plan aligns with your organization's goals and user roles.
Successful setup and operation depend on integration with the broader Microsoft ecosystem. You’ll need:
Ensure that these accounts are provisioned and linked to your organization’s domain for smooth deployment.
Clearly defining the roles involved in implementation is crucial for accountability and efficient collaboration. Common roles include:
Once prerequisites are in place, the next step is to strategically plan your environments to support development, testing, and production needs.
Proper environment planning is a critical step in setting up D365 F&O. It ensures that system deployments are well-structured, secure, and aligned with your organization’s development, testing, and production needs.
Microsoft Dynamics 365 F&O supports multiple environment types, each serving a distinct purpose in the deployment lifecycle:
Also Read: Financial Reporting in Dynamics 365 Management Reporter
Lifecycle Services (LCS) is Microsoft’s cloud-based portal for managing the application lifecycle of D365 F&O. It plays a central role in:
LCS ensures transparency, control, and collaboration across the entire project lifecycle.
To begin your implementation, you’ll need to create a project in LCS:
Ensure you link the LCS project to your Azure subscription to enable self-service deployment and resource control.
When setting up environments, selecting the appropriate Azure region is vital for compliance and performance. Consider:
With your LCS project ready and environments mapped, it’s time to begin the initial system configuration.
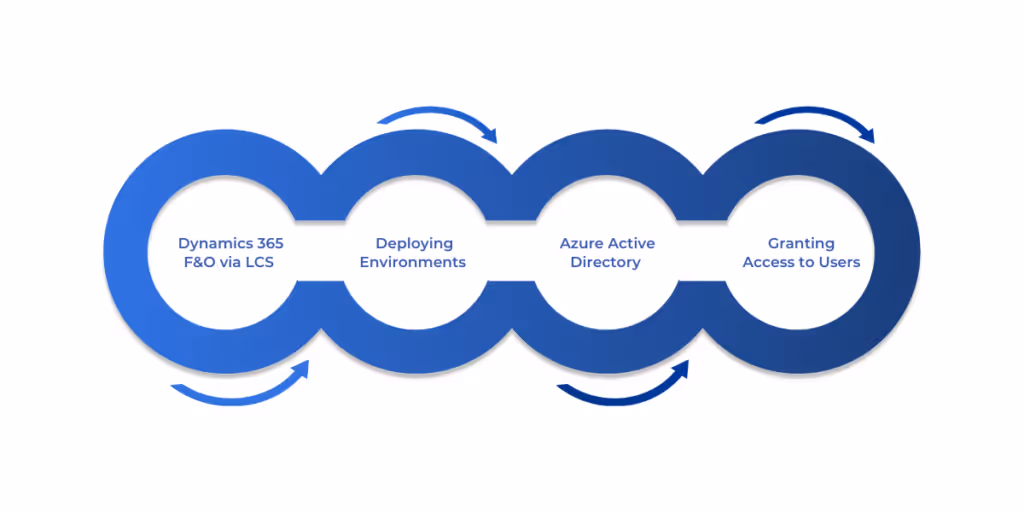
Once your LCS project is in place and environments are planned, the next step is to set up your D365 F&O system. This phase includes provisioning your environment, linking identity management systems, and configuring access control.
To begin setup, navigate to your LCS project dashboard:
You can deploy environments directly from the LCS Environments page:
Once deployed, the environment status will change to Deployed, and a login URL will become available.
Dynamics 365 F&O uses Azure Active Directory for authentication and identity management. Linking your environment to Azure AD ensures secure user access and centralized control.
During environment deployment:
You can confirm or change the tenant via LCS or by contacting Microsoft Support if needed.
Once your environment is active, follow these steps to grant user access:
To review or edit roles:
Setting up system access and environment controls early ensures your team can begin functional configuration and testing without delays or security risks.
Now that the system is accessible and secure, the next priority is localizing the solution for legal, regulatory, and tax compliance.
Also Read: How to Set Up Power BI with Dynamics 365 for Finance and Operations
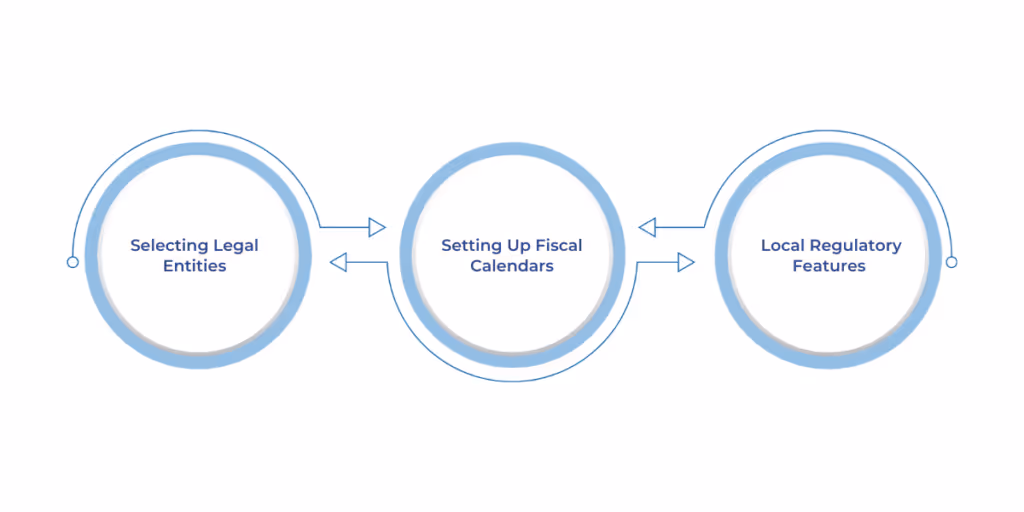
Localization is a critical part of configuring D365 F&O, ensuring the system complies with country-specific tax rules, legal requirements, and financial reporting standards. Microsoft offers extensive localization features tailored to various countries and regions.
Legal entities represent individual companies or subsidiaries within your organization that require separate accounting and regulatory compliance.
To configure legal entities:
Each legal entity can have its own chart of accounts, tax setup, and financial period configuration, but they can also share master data through the global address book and other shared services.
Fiscal calendars define the financial year structure used for accounting and reporting. To configure:
Set up sales tax, VAT, or GST based on the country of operation:
You can also use Tax Calculation Service (TCS) for advanced, rule-based tax calculation in multicountry implementations.
D365 F&O includes localized functionalities for over 40 countries, addressing tax regimes, electronic invoicing, reporting, and audit file generation.
Examples:
With compliance aligned, the core financial components can now be configured to support transactions, reporting, and strategic insights.
Setting up the core financial components of D365 F&O is essential to ensure accurate accounting, reporting, and compliance across all legal entities. This section outlines the foundational financial configurations that support daily operations and decision-making.
The Chart of Accounts (COA) defines the structure of your financial reporting framework.
You can set up multiple COAs if your organization spans multiple regions or industries, but typically, one COA is shared across entities for consistency.
Financial dimensions allow you to categorize and analyze financial data beyond just accounts. Common dimensions include:
Set up dimensions via:
General Ledger > Dimensions > Financial Dimension
Create account structures to define valid combinations of main accounts and dimensions. This ensures that users post transactions with the correct financial coding.
Posting profiles determine how transactions hit the general ledger.
They map customer/vendor/item groups to ledger accounts, ensuring correct revenue, expense, or tax accounting.
Journal names are templates for entering various types of transactions:
Define attributes such as approval workflows, number sequences, and default account types.
For organizations operating internationally, multiple currencies must be configured:
Currency setup supports:
Once financial foundations are laid, it’s time to set up the operations modules to support procurement, inventory, and supply chain processes.
Also Read: How to Create and Customize Dynamics 365 Dashboards
The Operations modules in D365 F&O cover all aspects of supply chain management, from defining products to handling procurement, inventory, distribution, and production planning. Proper configuration in this phase ensures streamlined operations, accurate inventory tracking, and efficient sourcing.
All supply chain transactions are built around products, making Product Information Management (PIM) a foundational step.
Steps to configure:
Also configure product lifecycle states and attributes for better governance.
This module manages the end-to-end procurement process. Key setup areas:
Enable workflows for purchase requisitions and approvals via Procurement and sourcing > Setup > Procurement workflows.
Inventory setup enables accurate stock tracking, valuation, and warehouse management.
Steps include:
As operations come online, it's critical to establish reporting and analytics capabilities for real-time visibility.
D365 F&O provides robust reporting and analytics capabilities to help organizations monitor financial performance, analyze operations, and make data-driven decisions. From built-in reports to embedded Power BI, the system supports both standard and custom reporting strategies tailored to your needs.
The Financial Reporter (previously Management Reporter) is the go-to tool for generating financial statements such as balance sheets, income statements, and cash flow reports.
Configuration steps:
D365 F&O integrates directly with Power BI, allowing visual analytics directly inside the ERP interface.
To set up embedded Power BI:
Workspaces in D365 F&O offer role-based landing pages for quick access to data, reports, and actions.
To configure a workspace:
You can also create custom workspaces via: Home > Workspaces > + Create Workspace
Successfully setting up D365 F&O requires careful planning, a structured approach, and ongoing collaboration between IT teams, consultants, and business users. From configuring core finance and supply chain modules to implementing security, reporting, and integrations, every step lays the foundation for a scalable, efficient, and compliant ERP environment.
By following this guide, you’ll be well-equipped to maximize your investment in D365 F&O, driving efficiency, agility, and innovation across your organization.
At WaferWire, we don’t just implement Dynamics 365 Finance and Operations; we architect scalable ERP foundations tailored to your industry, compliance needs, and business goals. From initial environment planning to localization, financial configuration, and Power Platform integrations, our team ensures every setup decision supports long-term agility and success.
Your ERP transformation starts with a setup done right. Contact us today to discover how WaferWire can streamline your Dynamics 365 Finance and Operations setup, turning complexity into clarity and operational chaos into coordinated growth.
1. Do I need technical expertise to set up Dynamics 365 F&O?
Yes, setup requires both functional and technical expertise, especially in areas like environment deployment, data migration, security roles, and integration. Many businesses partner with certified Microsoft consultants for implementation.
2. Can I deploy Dynamics 365 F&O on-premises?
While the cloud version is standard, Microsoft offers an on-premises deployment option for highly regulated industries. However, this comes with limitations on scalability, features, and support for updates.
3. How do I manage multiple legal entities?
Dynamics 365 F&O allows you to configure multiple legal entities within a single instance. Each entity can have separate financials, currencies, and tax regulations while sharing master data where needed.
4. How is security managed in D365 F&O?
Security is role-based and tied to Azure Active Directory. Users are granted access via predefined or custom roles, with duties and privileges controlling access to data and actions.
5. How do I integrate Dynamics 365 F&O with other Microsoft tools?
You can integrate D365 F&O with tools like Power BI, Power Automate, and Power Apps natively. For more advanced scenarios, you can use APIs, OData services, or middleware like Azure Logic Apps.


Dynamics 365 Finance and Operations (D365 F&O) is Microsoft’s cloud-based Enterprise Resource Planning (ERP) solution designed to unify global financials and operational processes under one intelligent platform.
It helps businesses automate routine tasks, gain deep financial insights, and ensure compliance with local and international regulations.
Whether you're preparing for your first deployment or fine-tuning an existing setup, this guide provides the foundational steps to ensure a smooth and successful implementation.
Before diving into configuration and deployment, it’s essential to lay the groundwork by meeting all the system prerequisites.
Before diving into the setup process for D365 F&O, it’s essential to ensure that all foundational requirements are in place. Addressing these prerequisites helps avoid delays, misconfigurations, and scalability issues later in the implementation.
To begin, organizations must procure the appropriate licenses through a Microsoft partner or directly via Microsoft. Licensing for D365 F&O typically includes:
Tip: Use Microsoft’s licensing guide to ensure the selected plan aligns with your organization's goals and user roles.
Successful setup and operation depend on integration with the broader Microsoft ecosystem. You’ll need:
Ensure that these accounts are provisioned and linked to your organization’s domain for smooth deployment.
Clearly defining the roles involved in implementation is crucial for accountability and efficient collaboration. Common roles include:
Once prerequisites are in place, the next step is to strategically plan your environments to support development, testing, and production needs.
Proper environment planning is a critical step in setting up D365 F&O. It ensures that system deployments are well-structured, secure, and aligned with your organization’s development, testing, and production needs.
Microsoft Dynamics 365 F&O supports multiple environment types, each serving a distinct purpose in the deployment lifecycle:
Also Read: Financial Reporting in Dynamics 365 Management Reporter
Lifecycle Services (LCS) is Microsoft’s cloud-based portal for managing the application lifecycle of D365 F&O. It plays a central role in:
LCS ensures transparency, control, and collaboration across the entire project lifecycle.
To begin your implementation, you’ll need to create a project in LCS:
Ensure you link the LCS project to your Azure subscription to enable self-service deployment and resource control.
When setting up environments, selecting the appropriate Azure region is vital for compliance and performance. Consider:
With your LCS project ready and environments mapped, it’s time to begin the initial system configuration.
Once your LCS project is in place and environments are planned, the next step is to set up your D365 F&O system. This phase includes provisioning your environment, linking identity management systems, and configuring access control.
To begin setup, navigate to your LCS project dashboard:
You can deploy environments directly from the LCS Environments page:
Once deployed, the environment status will change to Deployed, and a login URL will become available.
Dynamics 365 F&O uses Azure Active Directory for authentication and identity management. Linking your environment to Azure AD ensures secure user access and centralized control.
During environment deployment:
You can confirm or change the tenant via LCS or by contacting Microsoft Support if needed.
Once your environment is active, follow these steps to grant user access:
To review or edit roles:
Setting up system access and environment controls early ensures your team can begin functional configuration and testing without delays or security risks.
Now that the system is accessible and secure, the next priority is localizing the solution for legal, regulatory, and tax compliance.
Also Read: How to Set Up Power BI with Dynamics 365 for Finance and Operations
Localization is a critical part of configuring D365 F&O, ensuring the system complies with country-specific tax rules, legal requirements, and financial reporting standards. Microsoft offers extensive localization features tailored to various countries and regions.
Legal entities represent individual companies or subsidiaries within your organization that require separate accounting and regulatory compliance.
To configure legal entities:
Each legal entity can have its own chart of accounts, tax setup, and financial period configuration, but they can also share master data through the global address book and other shared services.
Fiscal calendars define the financial year structure used for accounting and reporting. To configure:
Set up sales tax, VAT, or GST based on the country of operation:
You can also use Tax Calculation Service (TCS) for advanced, rule-based tax calculation in multicountry implementations.
D365 F&O includes localized functionalities for over 40 countries, addressing tax regimes, electronic invoicing, reporting, and audit file generation.
Examples:
With compliance aligned, the core financial components can now be configured to support transactions, reporting, and strategic insights.
Setting up the core financial components of D365 F&O is essential to ensure accurate accounting, reporting, and compliance across all legal entities. This section outlines the foundational financial configurations that support daily operations and decision-making.
The Chart of Accounts (COA) defines the structure of your financial reporting framework.
You can set up multiple COAs if your organization spans multiple regions or industries, but typically, one COA is shared across entities for consistency.
Financial dimensions allow you to categorize and analyze financial data beyond just accounts. Common dimensions include:
Set up dimensions via:
General Ledger > Dimensions > Financial Dimension
Create account structures to define valid combinations of main accounts and dimensions. This ensures that users post transactions with the correct financial coding.
Posting profiles determine how transactions hit the general ledger.
They map customer/vendor/item groups to ledger accounts, ensuring correct revenue, expense, or tax accounting.
Journal names are templates for entering various types of transactions:
Define attributes such as approval workflows, number sequences, and default account types.
For organizations operating internationally, multiple currencies must be configured:
Currency setup supports:
Once financial foundations are laid, it’s time to set up the operations modules to support procurement, inventory, and supply chain processes.
Also Read: How to Create and Customize Dynamics 365 Dashboards
The Operations modules in D365 F&O cover all aspects of supply chain management, from defining products to handling procurement, inventory, distribution, and production planning. Proper configuration in this phase ensures streamlined operations, accurate inventory tracking, and efficient sourcing.
All supply chain transactions are built around products, making Product Information Management (PIM) a foundational step.
Steps to configure:
Also configure product lifecycle states and attributes for better governance.
This module manages the end-to-end procurement process. Key setup areas:
Enable workflows for purchase requisitions and approvals via Procurement and sourcing > Setup > Procurement workflows.
Inventory setup enables accurate stock tracking, valuation, and warehouse management.
Steps include:
As operations come online, it's critical to establish reporting and analytics capabilities for real-time visibility.
D365 F&O provides robust reporting and analytics capabilities to help organizations monitor financial performance, analyze operations, and make data-driven decisions. From built-in reports to embedded Power BI, the system supports both standard and custom reporting strategies tailored to your needs.
The Financial Reporter (previously Management Reporter) is the go-to tool for generating financial statements such as balance sheets, income statements, and cash flow reports.
Configuration steps:
D365 F&O integrates directly with Power BI, allowing visual analytics directly inside the ERP interface.
To set up embedded Power BI:
Workspaces in D365 F&O offer role-based landing pages for quick access to data, reports, and actions.
To configure a workspace:
You can also create custom workspaces via: Home > Workspaces > + Create Workspace
Successfully setting up D365 F&O requires careful planning, a structured approach, and ongoing collaboration between IT teams, consultants, and business users. From configuring core finance and supply chain modules to implementing security, reporting, and integrations, every step lays the foundation for a scalable, efficient, and compliant ERP environment.
By following this guide, you’ll be well-equipped to maximize your investment in D365 F&O, driving efficiency, agility, and innovation across your organization.
At WaferWire, we don’t just implement Dynamics 365 Finance and Operations; we architect scalable ERP foundations tailored to your industry, compliance needs, and business goals. From initial environment planning to localization, financial configuration, and Power Platform integrations, our team ensures every setup decision supports long-term agility and success.
Your ERP transformation starts with a setup done right. Contact us today to discover how WaferWire can streamline your Dynamics 365 Finance and Operations setup, turning complexity into clarity and operational chaos into coordinated growth.
1. Do I need technical expertise to set up Dynamics 365 F&O?
Yes, setup requires both functional and technical expertise, especially in areas like environment deployment, data migration, security roles, and integration. Many businesses partner with certified Microsoft consultants for implementation.
2. Can I deploy Dynamics 365 F&O on-premises?
While the cloud version is standard, Microsoft offers an on-premises deployment option for highly regulated industries. However, this comes with limitations on scalability, features, and support for updates.
3. How do I manage multiple legal entities?
Dynamics 365 F&O allows you to configure multiple legal entities within a single instance. Each entity can have separate financials, currencies, and tax regulations while sharing master data where needed.
4. How is security managed in D365 F&O?
Security is role-based and tied to Azure Active Directory. Users are granted access via predefined or custom roles, with duties and privileges controlling access to data and actions.
5. How do I integrate Dynamics 365 F&O with other Microsoft tools?
You can integrate D365 F&O with tools like Power BI, Power Automate, and Power Apps natively. For more advanced scenarios, you can use APIs, OData services, or middleware like Azure Logic Apps.


.svg)
