


Thank you! Your submission has been received!
Oops! Something went wrong while submitting the form.


In any data-driven organization, dashboards play a crucial role in providing visibility into key metrics, performance trends, and operational insights. Dynamics 365 offers powerful dashboard capabilities that enable users to monitor business data in real time, from sales pipelines and service requests to finance and operations. However, these insights are most valuable when they are shared with the right teams or individuals.
Knowing how to share a dashboard in Dynamics 365 ensures that decision-makers, stakeholders, and team members all have access to the same actionable information. Whether you need to distribute dashboards across departments, collaborate on performance goals, or support role-based reporting, this blog walks you through the available sharing options and how to share dashboards in Dynamics 365.
In Dynamics 365, dashboards serve as centralized views of data tailored to different roles and objectives. Understanding the distinction between System Dashboards and Personal Dashboards is essential before deciding how and with whom to share them.
1. System Dashboards
These are created by system administrators and are available to all users within a specific app or security role. They're typically used for organisation-wide metrics, KPIs, or departmental overviews, such as sales performance dashboards or service ticket queues.
Because they are managed at the system level, they are not shared like personal dashboards; instead, they are assigned through security roles.
2. Personal Dashboards
These are created by individual users based on their preferences, data filters, or job responsibilities. They're great for custom views, individual goals, or temporary projects. Personal dashboards can be shared with other users or teams, and access can be tailored to allow viewing, editing, or further sharing.
Before you can share dashboards effectively in Dynamics 365, certain permissions and settings must be in place. Ensuring these foundational elements are set up correctly helps avoid access issues or sharing limitations later on.
Suggested Read: How to Create and Customize Dynamics 365 Dashboards

To successfully share dashboards in Dynamics 365, it’s important to meet a few foundational conditions. These prerequisites ensure that both the user sharing the dashboard and the recipient have the correct roles, permissions, and access settings in place.
Here are the key requirements to check before sharing a dashboard in Dynamics 365:
Once the prerequisites are met, you can proceed to selecting the most suitable method for sharing, customized to your business needs.
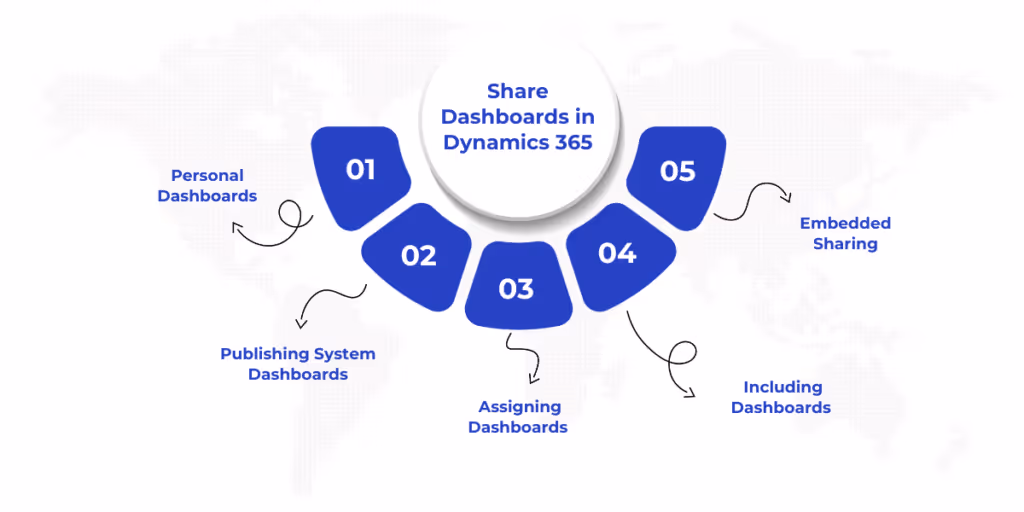
Dynamics 365 provides several ways to share dashboards, each suited to different scenarios from individual collaboration to broad organizational reporting. The right method depends on the dashboard type, the audience, and access control requirements.
Here are the primary ways to share dashboards in Dynamics 365:
Now that you understand the various methods available for sharing dashboards, let’s walk through how to apply them. Each sharing method in Dynamics 365 has its own setup process depending on whether the dashboard is personal, system-based, embedded in apps, or integrated with Power BI.
Sharing a dashboard in Dynamics 365 isn’t just about access—it’s about making sure the right people have the right visibility into data that supports their decisions. With the right permissions and setup, you can share insights efficiently across individuals, teams, or entire departments.
Here’s a quick guide to how each sharing method is carried out:
This method lets you share a dashboard you've personally created with selected users or teams. It’s great for collaborating on custom dashboards tied to your role or responsibilities.
Steps:
Tip: Only dashboards that you own can be shared. If you didn’t create it, you won’t see the share option.
System dashboards are created and managed by administrators and are meant for broader, organization-level access.
Steps:
Tip: Only users with matching security roles will be able to see system dashboards.
When dashboards need to be shared among a group (e.g., a sales team), assigning ownership to a team ensures everyone with the right permissions has access.
Steps:
Tip: Teams must already exist in your Dynamics 365 setup, and users must belong to those teams.
If you want users to access dashboards within a specific model-driven app, you can add them through the app designer.
Steps:
Tip: Make sure the app’s security roles include access to the dashboard and the underlying data.
Use this method to embed advanced dashboards built in Power BI directly into Dynamics 365. This allows for rich visuals and sharing flexibility.
Steps:
Tip: Users must have the correct Power BI license and access to the report to view it inside Dynamics 365.
Once a dashboard is shared, it becomes a collaborative asset, one that should be both accessible and reliable. To ensure it serves its purpose effectively, a few good practices should be kept in mind.
Also Read: Key Uses and Benefits of Microsoft Dynamics 365
Sharing dashboards in Dynamics 365 should be approached with clarity and intention. It’s important to maintain consistency, protect data integrity, and ensure dashboards remain relevant for the intended audience.
Here are some of the best practices you should keep in mind when sharing dashboards:
By following these practices, you help ensure dashboards are both useful and secure. Consistent management makes it easier for teams to rely on shared insights for timely and informed decisions.
Sharing dashboards in Dynamics 365 isn't just a matter of convenience—it’s a key step toward improving visibility, collaboration, and data-driven decision-making across your organization. Whether you're sharing system dashboards for broader insights or personal dashboards tailored to specific roles, having a clear approach ensures that your teams always have the right data at the right time.
WaferWire supports organizations in getting more from Dynamics 365 by enabling smooth implementation, tailored configurations, and user adoption—key factors in making dashboards effective and accessible. With a deep understanding of Dynamics 365 Customer Engagement, our team helps businesses ensure that their dashboards reflect real-time data, support end-user needs, and scale as the organization grows.
Need help optimizing dashboards in Dynamics 365? Schedule a consultation today to explore how we can help streamline dashboard access and improve user engagement.
Q. Can I share a system dashboard with specific users in Dynamics 365?
A. System dashboards are managed at the admin level and are typically visible to all users with appropriate security roles. To control who sees them, you need to adjust security roles and permissions through the Settings area.
Q. How can I restrict access to shared dashboards in Dynamics 365?
A. When sharing a dashboard, you can assign permissions like "Read," "Write," and "Delete" to specific users or teams. This ensures that only those with the right access levels can view or edit the dashboard.
Q. Is it possible to share a dashboard with a team in Dynamics 365?
A. Yes, you can assign a personal dashboard to a team, which ensures that all members with the right permissions have access to the same dashboard without assigning access individually.
Q. How do I embed a Power BI dashboard into Dynamics 365 for sharing?
A. To embed a Power BI dashboard, enable Power BI visualization embedding in Dynamics 365, then create a new Power BI dashboard within the platform. Afterward, use Power BI’s sharing features to invite users or assign access to a workspace.


In any data-driven organization, dashboards play a crucial role in providing visibility into key metrics, performance trends, and operational insights. Dynamics 365 offers powerful dashboard capabilities that enable users to monitor business data in real time, from sales pipelines and service requests to finance and operations. However, these insights are most valuable when they are shared with the right teams or individuals.
Knowing how to share a dashboard in Dynamics 365 ensures that decision-makers, stakeholders, and team members all have access to the same actionable information. Whether you need to distribute dashboards across departments, collaborate on performance goals, or support role-based reporting, this blog walks you through the available sharing options and how to share dashboards in Dynamics 365.
In Dynamics 365, dashboards serve as centralized views of data tailored to different roles and objectives. Understanding the distinction between System Dashboards and Personal Dashboards is essential before deciding how and with whom to share them.
1. System Dashboards
These are created by system administrators and are available to all users within a specific app or security role. They're typically used for organisation-wide metrics, KPIs, or departmental overviews, such as sales performance dashboards or service ticket queues.
Because they are managed at the system level, they are not shared like personal dashboards; instead, they are assigned through security roles.
2. Personal Dashboards
These are created by individual users based on their preferences, data filters, or job responsibilities. They're great for custom views, individual goals, or temporary projects. Personal dashboards can be shared with other users or teams, and access can be tailored to allow viewing, editing, or further sharing.
Before you can share dashboards effectively in Dynamics 365, certain permissions and settings must be in place. Ensuring these foundational elements are set up correctly helps avoid access issues or sharing limitations later on.
Suggested Read: How to Create and Customize Dynamics 365 Dashboards
To successfully share dashboards in Dynamics 365, it’s important to meet a few foundational conditions. These prerequisites ensure that both the user sharing the dashboard and the recipient have the correct roles, permissions, and access settings in place.
Here are the key requirements to check before sharing a dashboard in Dynamics 365:
Once the prerequisites are met, you can proceed to selecting the most suitable method for sharing, customized to your business needs.
Dynamics 365 provides several ways to share dashboards, each suited to different scenarios from individual collaboration to broad organizational reporting. The right method depends on the dashboard type, the audience, and access control requirements.
Here are the primary ways to share dashboards in Dynamics 365:
Now that you understand the various methods available for sharing dashboards, let’s walk through how to apply them. Each sharing method in Dynamics 365 has its own setup process depending on whether the dashboard is personal, system-based, embedded in apps, or integrated with Power BI.
Sharing a dashboard in Dynamics 365 isn’t just about access—it’s about making sure the right people have the right visibility into data that supports their decisions. With the right permissions and setup, you can share insights efficiently across individuals, teams, or entire departments.
Here’s a quick guide to how each sharing method is carried out:
This method lets you share a dashboard you've personally created with selected users or teams. It’s great for collaborating on custom dashboards tied to your role or responsibilities.
Steps:
Tip: Only dashboards that you own can be shared. If you didn’t create it, you won’t see the share option.
System dashboards are created and managed by administrators and are meant for broader, organization-level access.
Steps:
Tip: Only users with matching security roles will be able to see system dashboards.
When dashboards need to be shared among a group (e.g., a sales team), assigning ownership to a team ensures everyone with the right permissions has access.
Steps:
Tip: Teams must already exist in your Dynamics 365 setup, and users must belong to those teams.
If you want users to access dashboards within a specific model-driven app, you can add them through the app designer.
Steps:
Tip: Make sure the app’s security roles include access to the dashboard and the underlying data.
Use this method to embed advanced dashboards built in Power BI directly into Dynamics 365. This allows for rich visuals and sharing flexibility.
Steps:
Tip: Users must have the correct Power BI license and access to the report to view it inside Dynamics 365.
Once a dashboard is shared, it becomes a collaborative asset, one that should be both accessible and reliable. To ensure it serves its purpose effectively, a few good practices should be kept in mind.
Also Read: Key Uses and Benefits of Microsoft Dynamics 365
Sharing dashboards in Dynamics 365 should be approached with clarity and intention. It’s important to maintain consistency, protect data integrity, and ensure dashboards remain relevant for the intended audience.
Here are some of the best practices you should keep in mind when sharing dashboards:
By following these practices, you help ensure dashboards are both useful and secure. Consistent management makes it easier for teams to rely on shared insights for timely and informed decisions.
Sharing dashboards in Dynamics 365 isn't just a matter of convenience—it’s a key step toward improving visibility, collaboration, and data-driven decision-making across your organization. Whether you're sharing system dashboards for broader insights or personal dashboards tailored to specific roles, having a clear approach ensures that your teams always have the right data at the right time.
WaferWire supports organizations in getting more from Dynamics 365 by enabling smooth implementation, tailored configurations, and user adoption—key factors in making dashboards effective and accessible. With a deep understanding of Dynamics 365 Customer Engagement, our team helps businesses ensure that their dashboards reflect real-time data, support end-user needs, and scale as the organization grows.
Need help optimizing dashboards in Dynamics 365? Schedule a consultation today to explore how we can help streamline dashboard access and improve user engagement.
Q. Can I share a system dashboard with specific users in Dynamics 365?
A. System dashboards are managed at the admin level and are typically visible to all users with appropriate security roles. To control who sees them, you need to adjust security roles and permissions through the Settings area.
Q. How can I restrict access to shared dashboards in Dynamics 365?
A. When sharing a dashboard, you can assign permissions like "Read," "Write," and "Delete" to specific users or teams. This ensures that only those with the right access levels can view or edit the dashboard.
Q. Is it possible to share a dashboard with a team in Dynamics 365?
A. Yes, you can assign a personal dashboard to a team, which ensures that all members with the right permissions have access to the same dashboard without assigning access individually.
Q. How do I embed a Power BI dashboard into Dynamics 365 for sharing?
A. To embed a Power BI dashboard, enable Power BI visualization embedding in Dynamics 365, then create a new Power BI dashboard within the platform. Afterward, use Power BI’s sharing features to invite users or assign access to a workspace.


.svg)
